Creating your Stripe Connect Account
For Groups, prior to the RunPTO affiliate accounts creating their connected accounts, the Group Master Stripe Account needs to be created and the API keys entered in the RunPTO group setup.
For standalone PTO accounts, please proceed with the steps below…
Steps for creating the Stripe connected accounts
Step 1
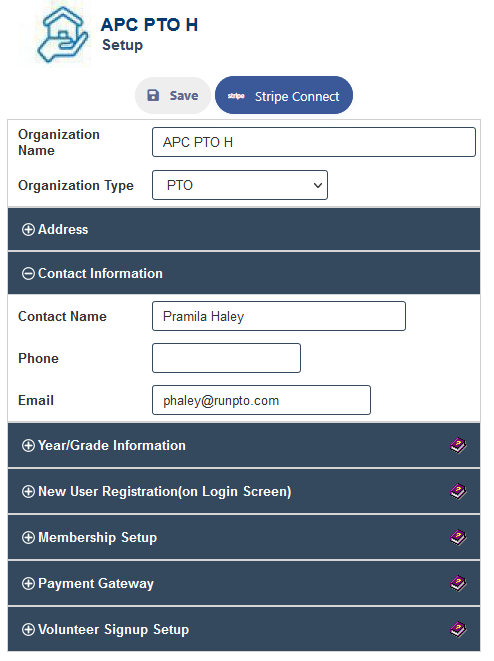
Click on the Stripe Connect button on the Administrator->Setup module
Step 2
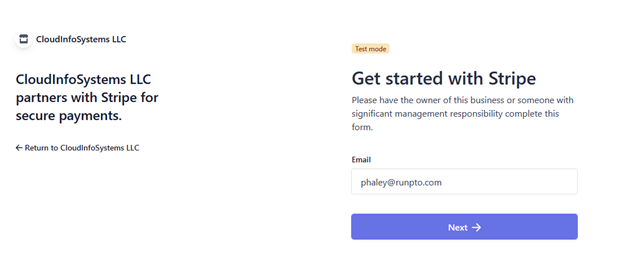
You will be taken to Stripe Server where you will begin to enter your information for opening a Stripe connected account.
If you are affiliated with a RunPTO Group account, you will see your Group name instead of CloudInfoSystems LLC.
Begin by entering the email and then click on Next
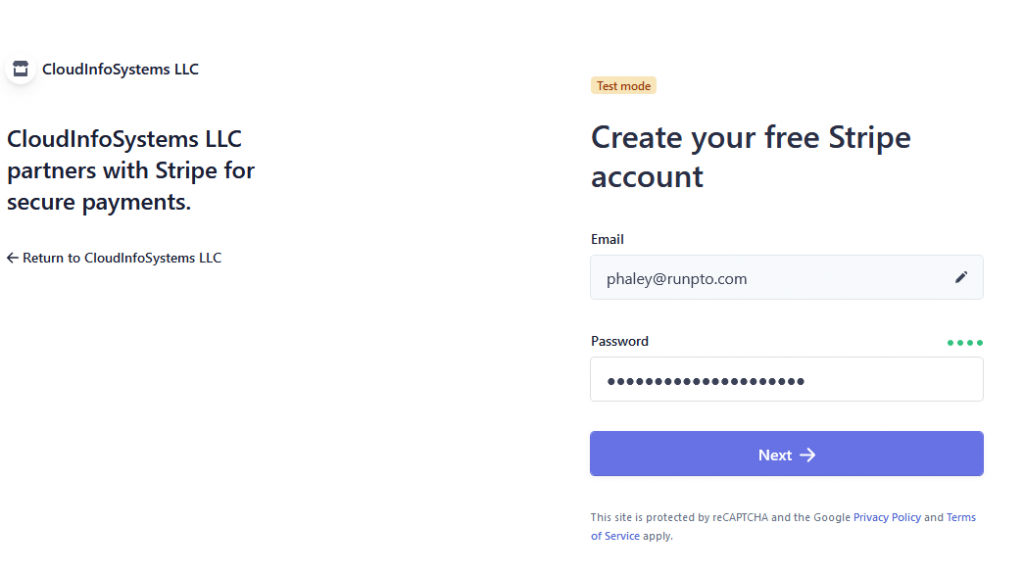
Step 3
Enter the secure password and then click on Next
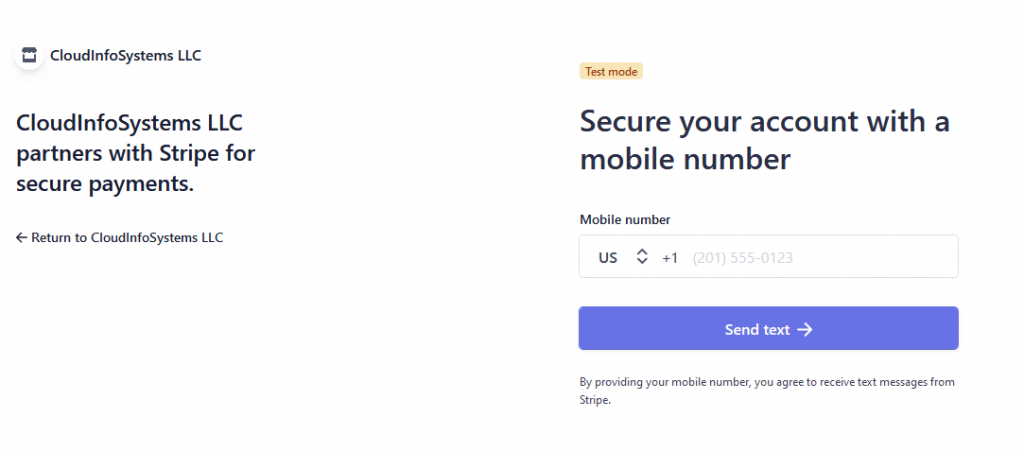
Step 4
Provide your phone number and click on Next. You will receive a auth code on your mobile phone.
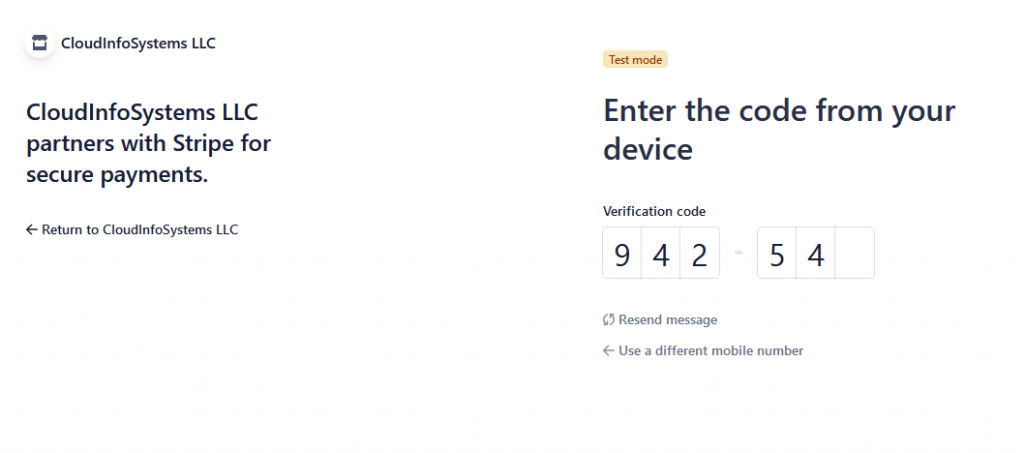
Step 5
Enter this auth code .
Step 6
You will receive the following message. Store the backup code somewhere and then click on Next.

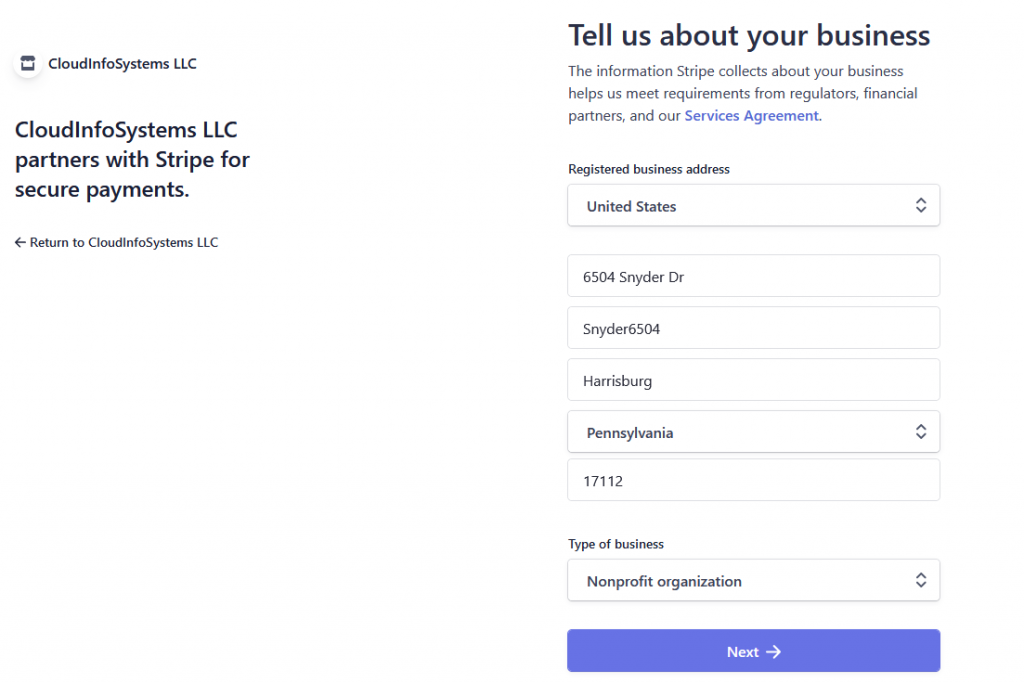
Step 7
Enter the business address & type of business and then click on Next.
Step 8
Enter the name for your organization, EIN, phone number and other details. If you are going to use RunPTOs website, your can enter the website as https://www.runpto/u/< your orgid>

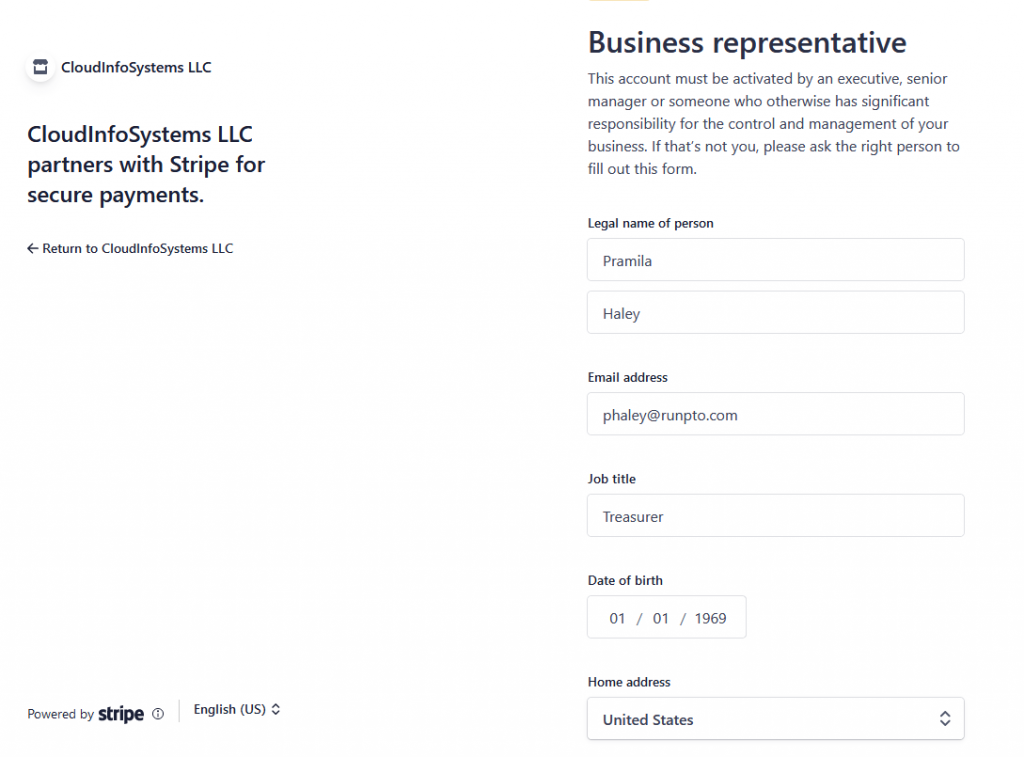
Step 9
The information of the administrator who will be managing this account.
Step 10
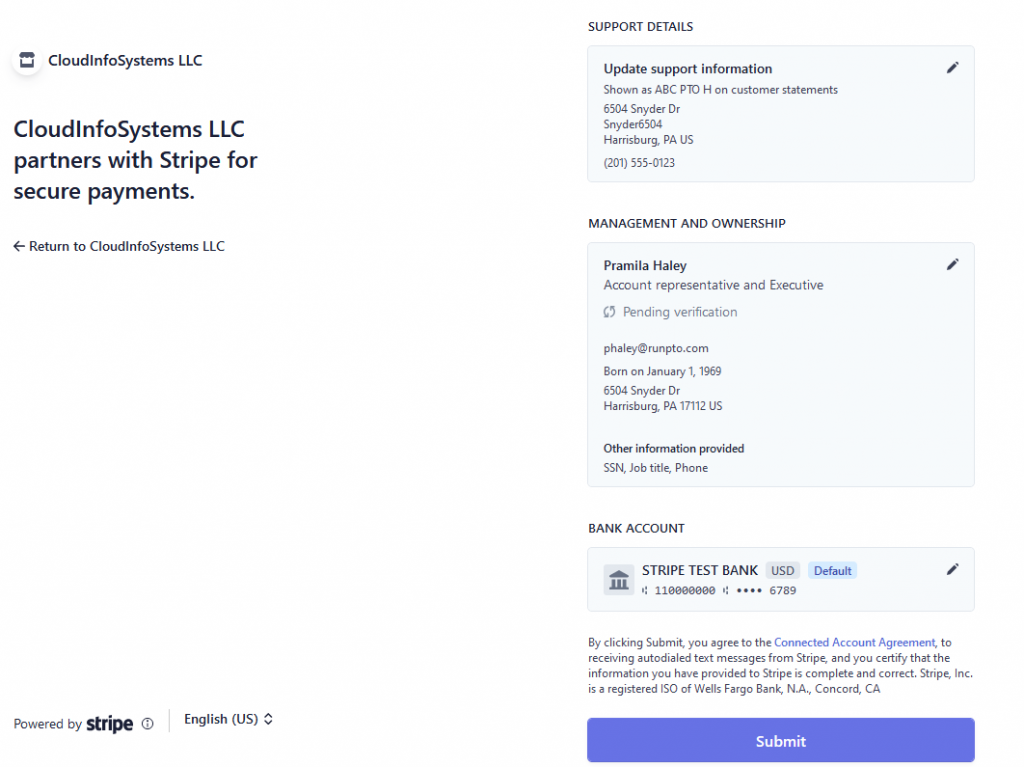
Enter the customer support details

Step 11
Click on Submit after all the information is entered.
Step 12
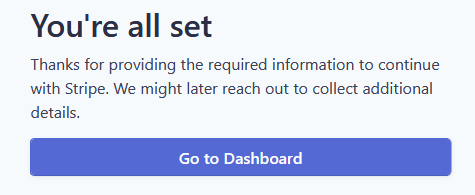
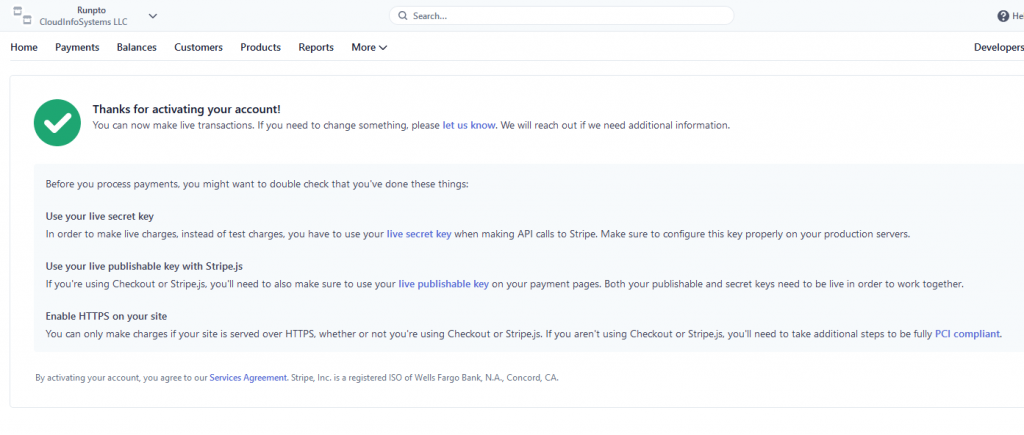
You will receive the following from RunPTO. Note there might be still pending verification or documents to be uploaded for your organization.
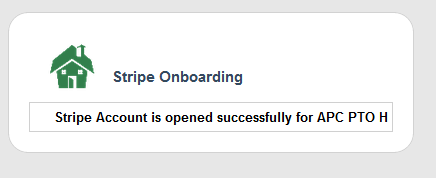
You need to see the below message from Stripe to make sure they have all the necessary information for your account.
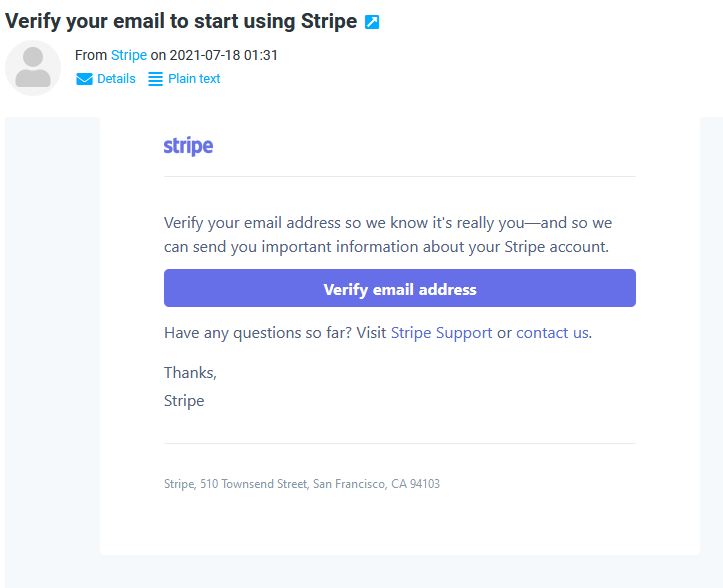
Step 13
You will receive a email from Stripe. Click on Verify email address to activate your Stripe connected account.
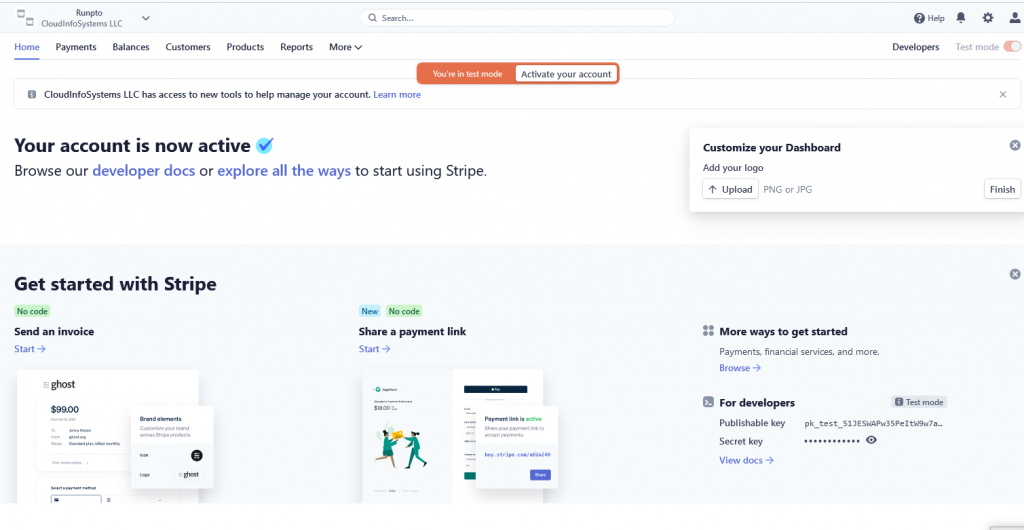
Step 14
Once activated you will see the following Stripe Home screen. You will see the test API keys on the lower right of the screen. To get live keys , you have to click on Activate your Account.

Step 15
You can use the test keys for testing. But you will have to replace with live keys when you organization start collecting money.
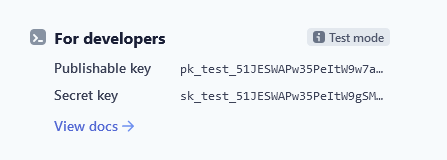
Step 16
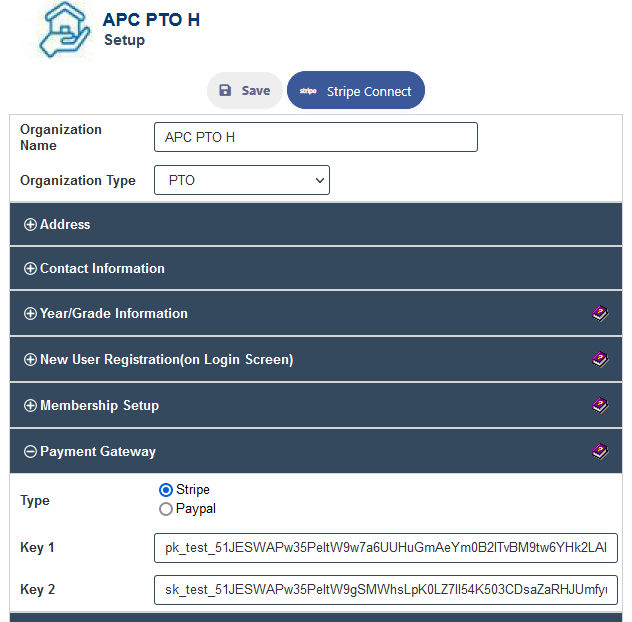
The test keys or live keys will be entered in the Payment Gateway section of the Setup screen.
Publishable key will go in key 1.
Secret key will go in key 2.
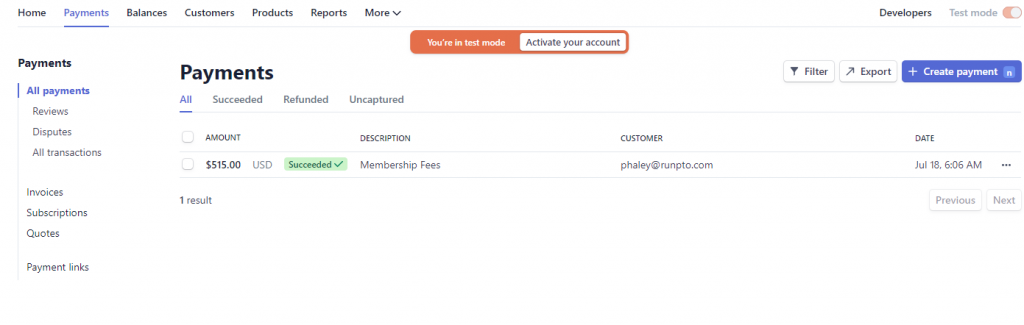
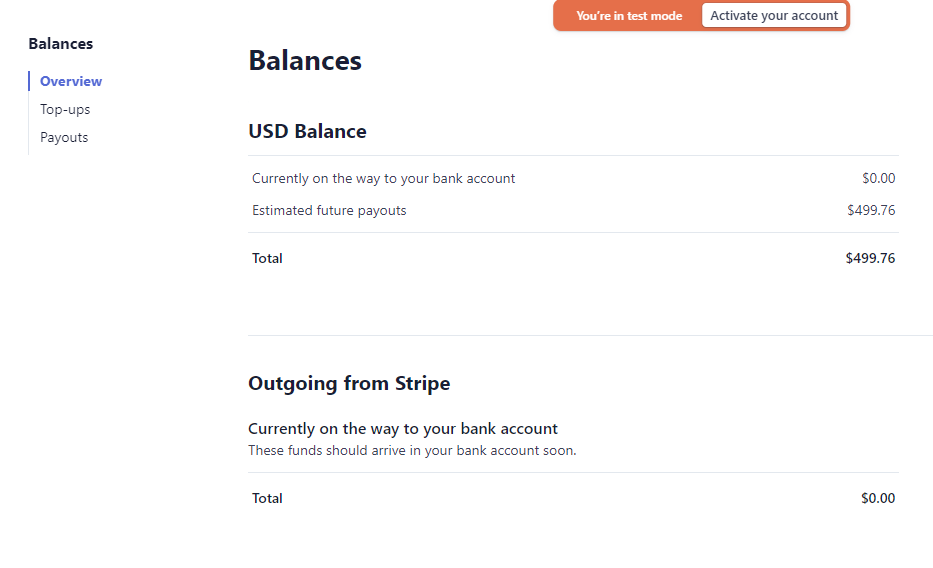
Step 17
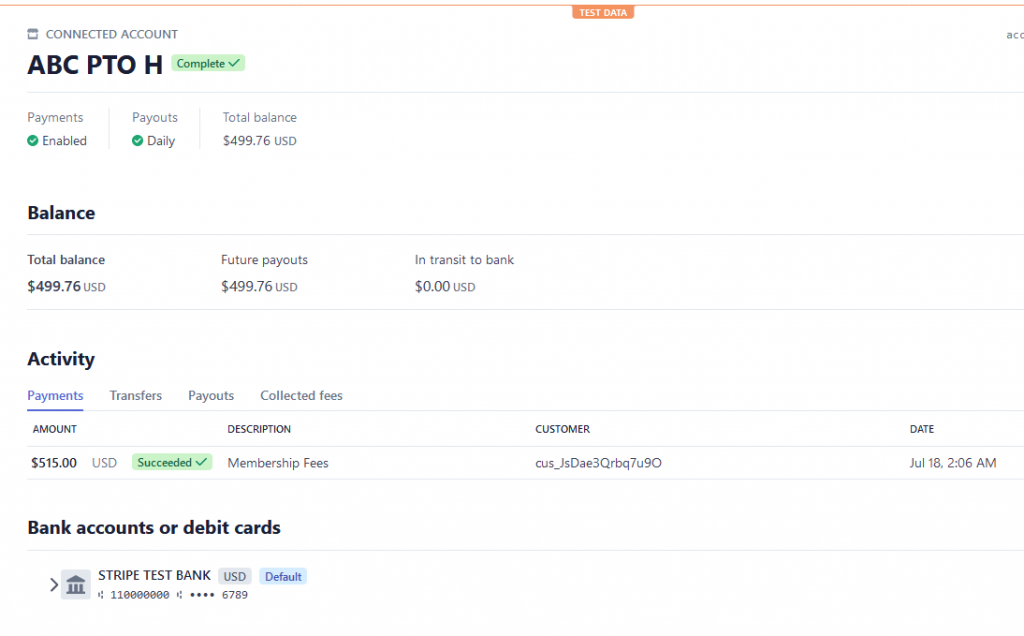
You will able to see all the payments and balances in your Stripe Connected account.
The below is only for Group Accounts
Group Master Stripe account privileges
The Group Master Stripe account will be able to view the connected accounts as they are completed.
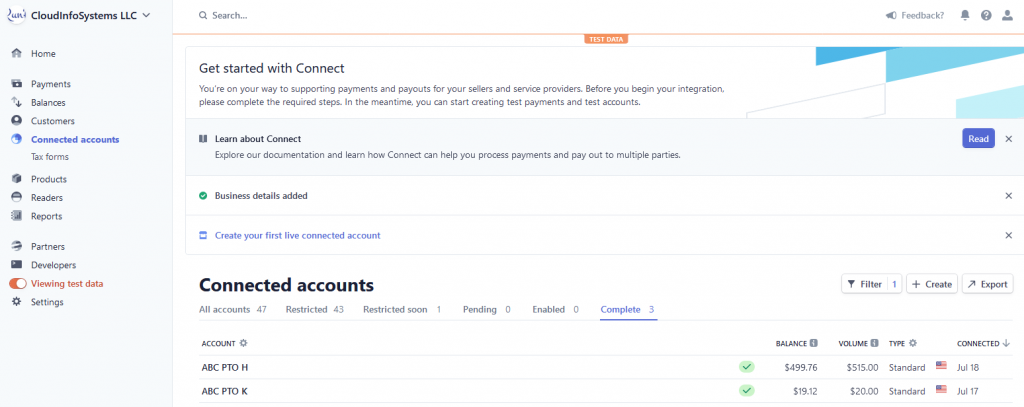
The Group Master Stripe account can also view the balances and the individual transactions.