Import Transactions
Import Transactions
“Import Transactions” feature allows users to effortlessly bring in income and expense data from external sources through a CSV file. When utilizing this functionality, various transaction details like type, transaction date, name, account category, cleared status, reference/check amount, and memo are seamlessly imported.

CSV File Format

To import your data successfully, please ensure that the CSV file adheres to the specified format as follows:
The first row must serve as the header and should contain the following columns:
Column 1: Type
Column 2: Transaction Date
Column 3: Name
Column 4: Account Category
Column 5: Cleared
Column 6: Ref/Check No
Column 7: Amount
Column 8: Memo
Subsequent rows should represent individual records, and each column should be populated with appropriate values.
For example:
Column 1: I
Column 2: 9/1/2021
Column 3: Monica Erb
Column 4: Book Fair
Column 5: Y
Column 6: 1234
Column 7: 400
Column 8: Income from Book Fair
Please follow these guidelines while filling in the data:
- Type: Use “I” for Income or “E” for Expense.
- Transaction Date: Format it as mm/dd/yyyy.
- Name: Leave it blank if there is no name information available.
- Account Category: Provide a description of the Account Category from the Chart of Accounts.
- Cleared: Use “Y” if the transaction is cleared, or “N” if it’s not cleared.
- Ref No/Check No: Leave it blank if there is no reference number or check number.
- Amount: Enter the transaction amount in the respective field.
- Memo: Leave it blank if there is no memo information available.
By adhering to these instructions, you can ensure proper and accurate data entry.
Steps to Import Transactions Data
Step 1
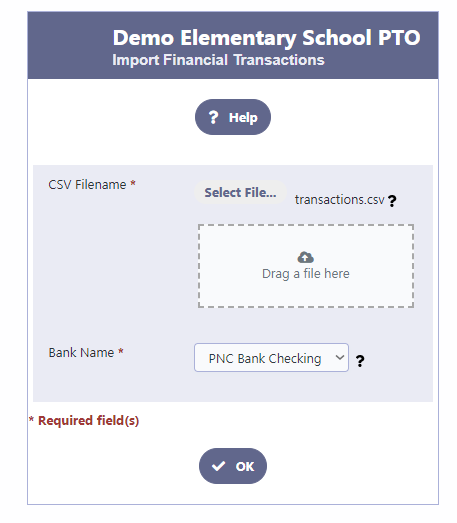
Please follow these steps to import the Transactions data from your desktop:
- Choose the CSV file containing the transactions data from your desktop.
- Select the corresponding Bank for the transactions.
- Finally, click on the “OK” button to initiate the import process.
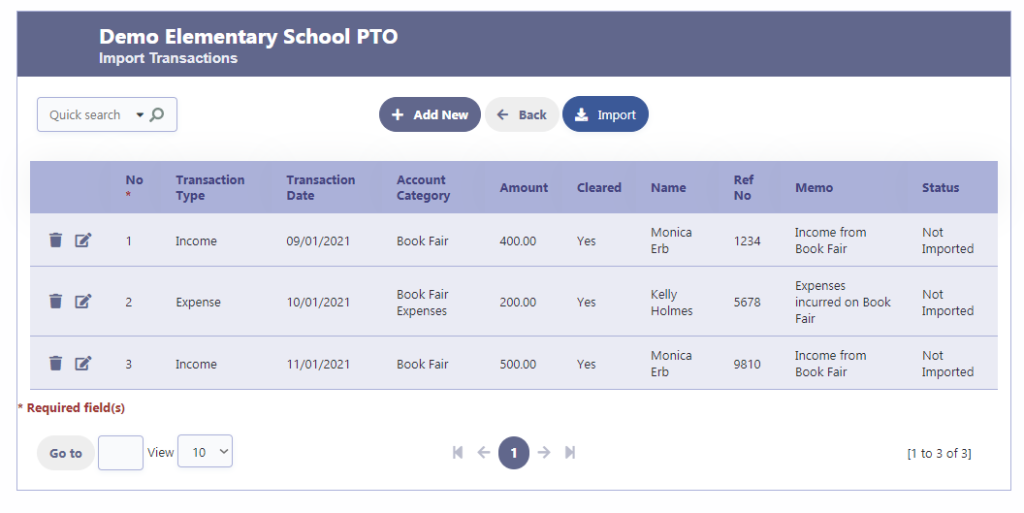
Step 2
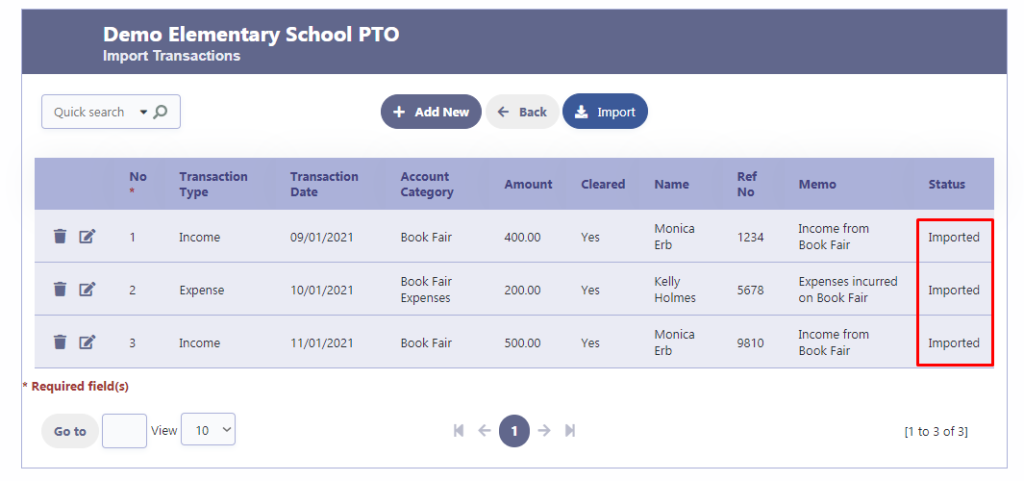
Upon uploading the CSV file, you will encounter a grid displaying the data from the file. If any modifications or deletions are required, simply click on the respective edit or delete icon. Once you are satisfied with the data and have made all the necessary adjustments, click on the “Import” button to finalize the process.
Step 3
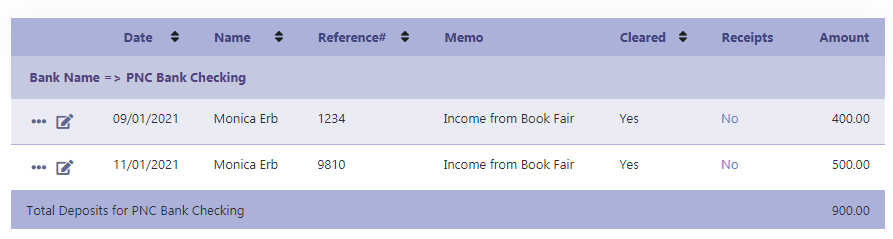
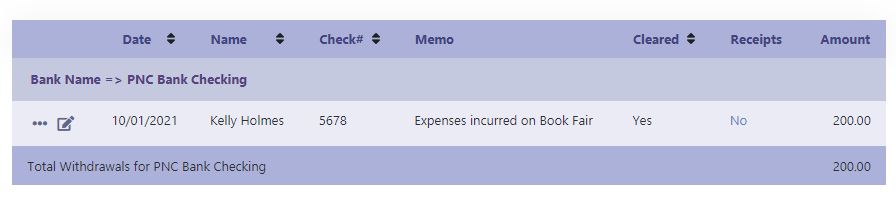
Once the transactions data is imported into the Financial database, the Status on each row will be updated to “Imported.”