Import Student Data
Import Student Data
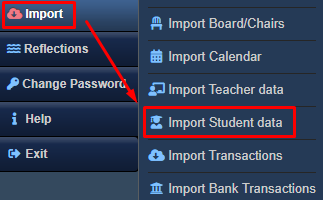
“Import Student Data” feature in RunPTO allows you to upload student data from external sources using a CSV file. This includes important details such as the student’s name, parent 1 name, parent 2 name, teacher, address, email, and phone numbers. Prior to importing student data, it is recommended to first import the teacher’s data to ensure accurate matching of teacher names. By utilizing this feature, you can efficiently import a large amount of student data into the system, saving time and effort.
CSV File Format

To import the transactions, please ensure your CSV file follows the specified format:
The first row must serve as the header and should contain the following columns:
Column 1: Name
Column 2: Parent 1 Name
Column 3: Parent 2 Name
Column 4: Grade
Column 5: Teacher
Column 6: Address 1
Column 7: Address 2
Column 8: Email 1
Column 9: Email 2
Column 10: Phone 1
Column 11: Phone 2
Subsequent rows should represent individual records, and each column should be populated with appropriate values.
For example:
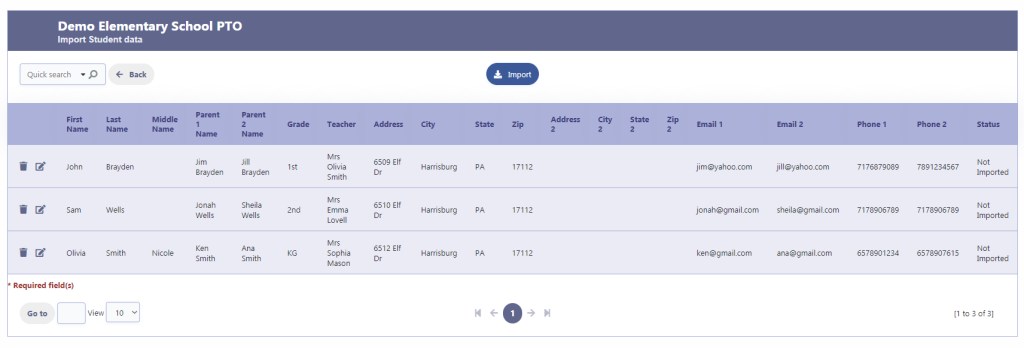
Column 1: John Brayden
Column 2: Jim Brayden
Column 3: Jill Brayden
Column 4: 1
Column 5: Olivia Smith
Column 6: 6509 Elf Dr,Harrisburg, PA 17112
Column 7:
Column 8: jim@yahoo.com
Column 9: jill@yahoo.com
Column 10: 7176870869
Column 11: 7891234567
Please follow these guidelines while entering data:
- Address should be in the format:
Street Address, City, State, Zipcode. - Teacher Name should include both the first name and last name of the teacher separated by a space.
- Ensure that teachers already exist in RunPTO before loading students.
- Grade should use numeric values, ranging from -1 for Pre-K, 0 for Kindergarten (KG), 1 for 1st grade, 2 for 2nd grade, and so on.
Steps to Import Students Data
Step 1
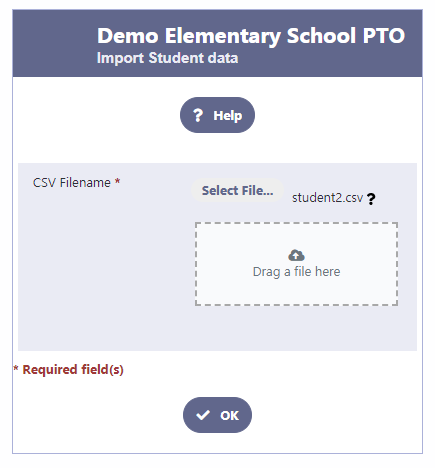
Please follow these steps to import the student data from your desktop:
- Choose the CSV file containing the student data from your desktop.
- After selecting the file, click on the “OK” button to initiate the import process.
Step 2
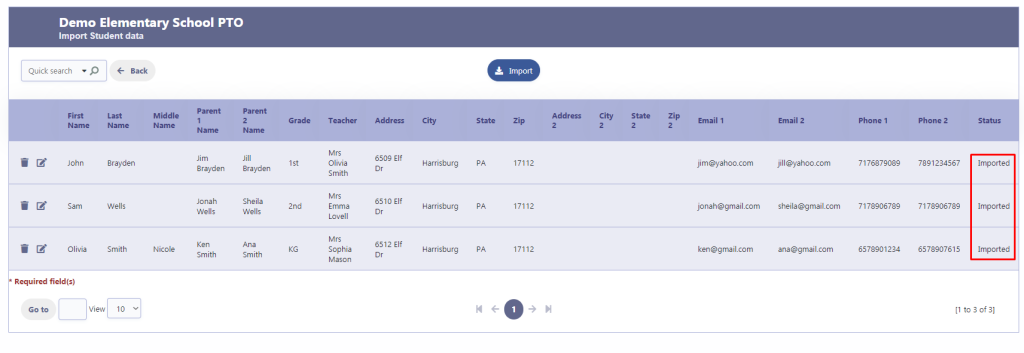
Upon selecting the CSV file, a grid displaying the student data from the file will be presented to you. If any modifications or deletions are necessary, simply click on the corresponding edit or delete icon. Once you have reviewed and ensured that all the data is accurate, click on the “Import” button to finalize the process.
Step 3
The student data will be imported into the Student database and the Status on the row will be changed to Imported