Chart of Accounts
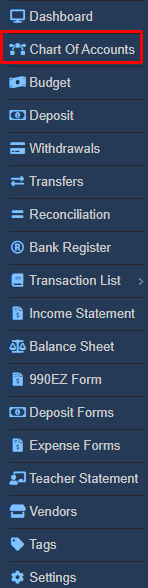
To begin, you need to establish your Chart of Accounts. Access the Chart of Accounts by navigating to the Finance section and selecting the option for Chart of Accounts.
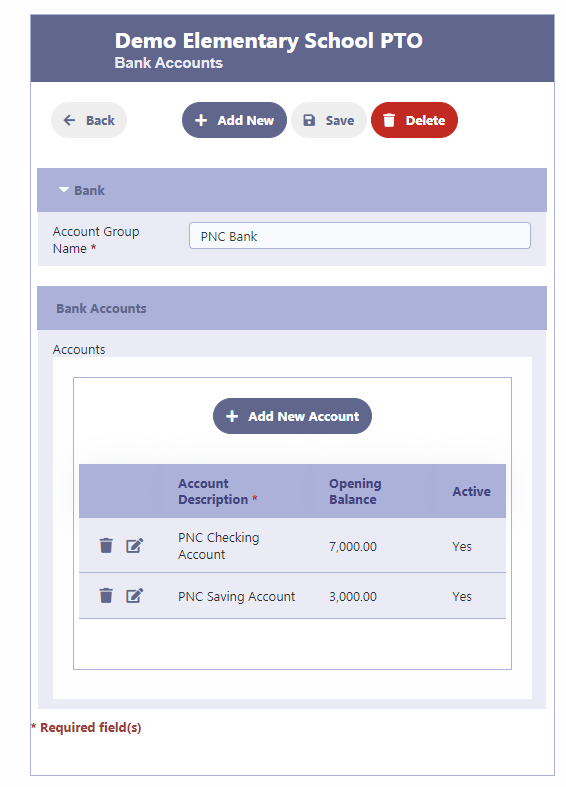
Adding Bank Accounts
To get started, begin by adding your Bank Accounts. Click on the “Add Groups” and then “Add Bank” option to input the names of your banks. Then, click on the pencil icon to specify the checking and savings accounts under each respective bank name.
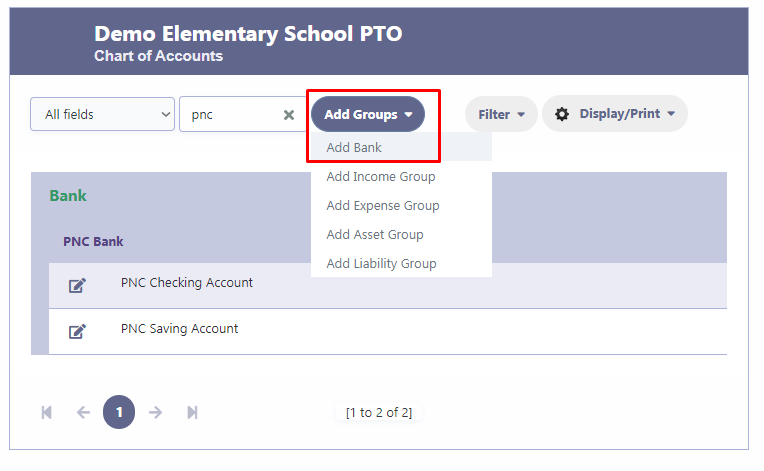
To ensure smooth functionality, it is essential to include your Bank Group in the Chart of Accounts. Without defining the Bank Group, you will be unable to perform any Deposit or Withdrawal transactions.
Adding Opening Balances to Bank Accounts
To ensure accurate financial tracking, you can add opening balances after setting up your Bank Checking or Saving Accounts. If applicable, input the opening balances for each account to reflect the initial funds available in the accounts.
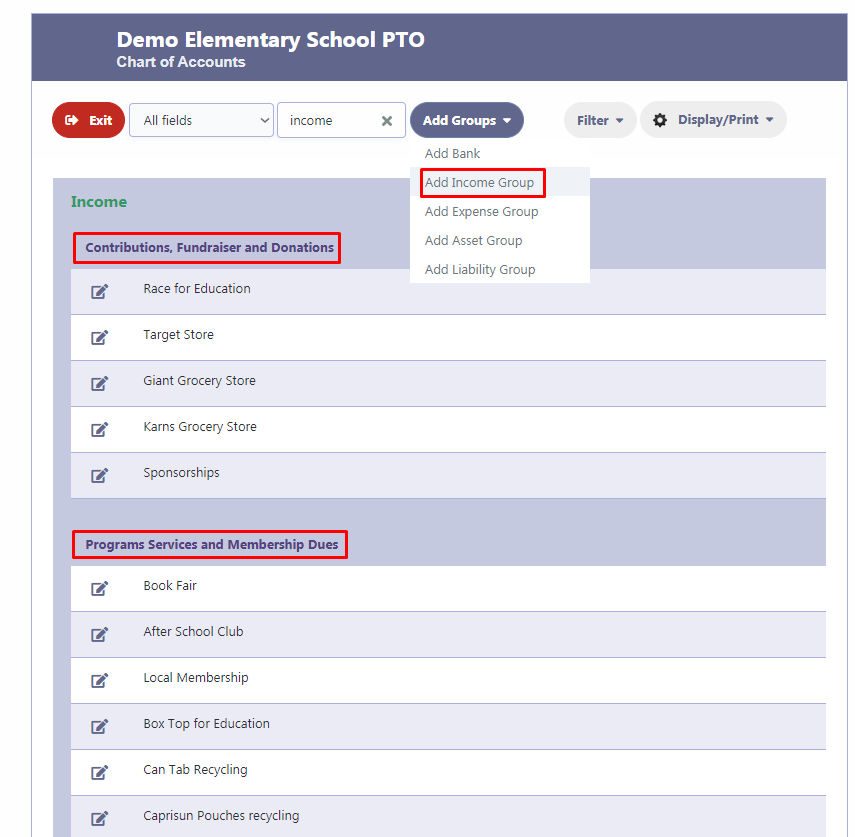
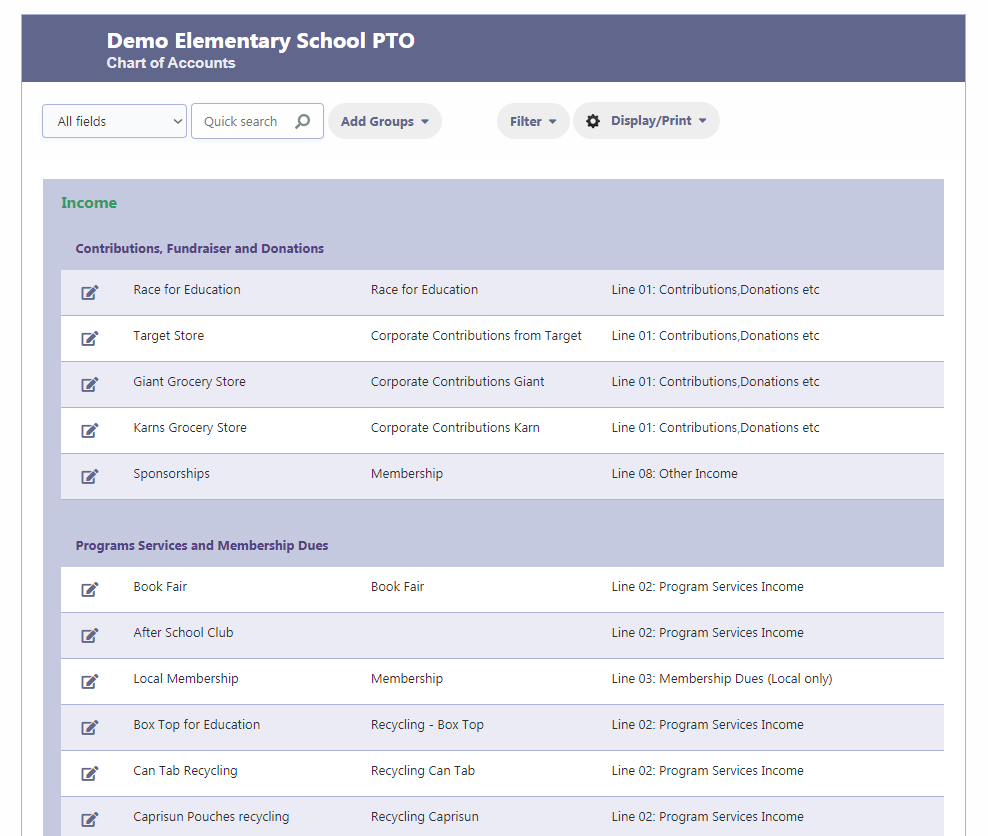
Adding Income Groups
To organize your financial transactions effectively, you can add Income Groups to categorize different sources of income. Start by clicking on “Add Groups/Add Income Group” to create Income Groups such as Contributions, Fundraiser and Donations and Programs Services and Membership Dues and so on. To further specify the accounts within these income groups, click on the pencil icon and add the respective accounts.
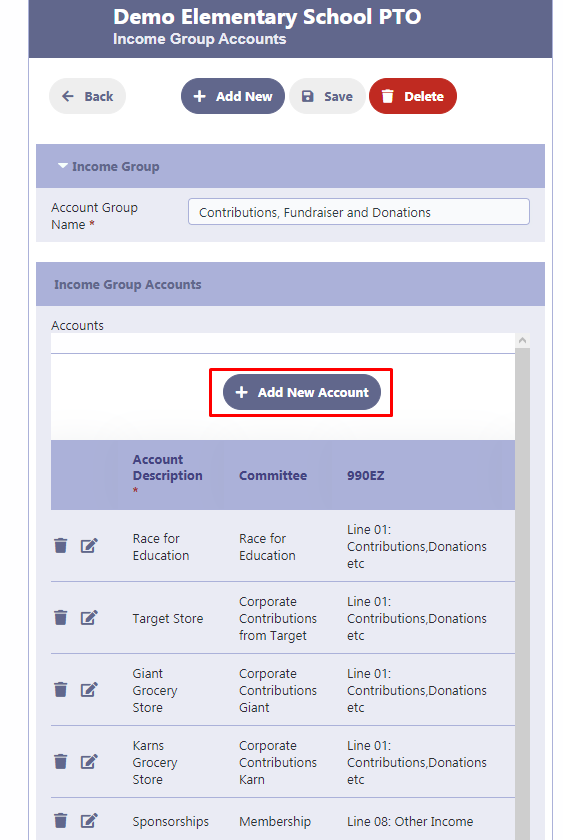
Adding Income Accounts
To track your income accurately, you can start entering individual accounts within your Income Group. Click on “Add New Account” to create a new account. Once you have entered the account details, use the check icon to save it. If you need to make any edits, use the pencil icon, and if you want to remove an account, use the trash can icon.
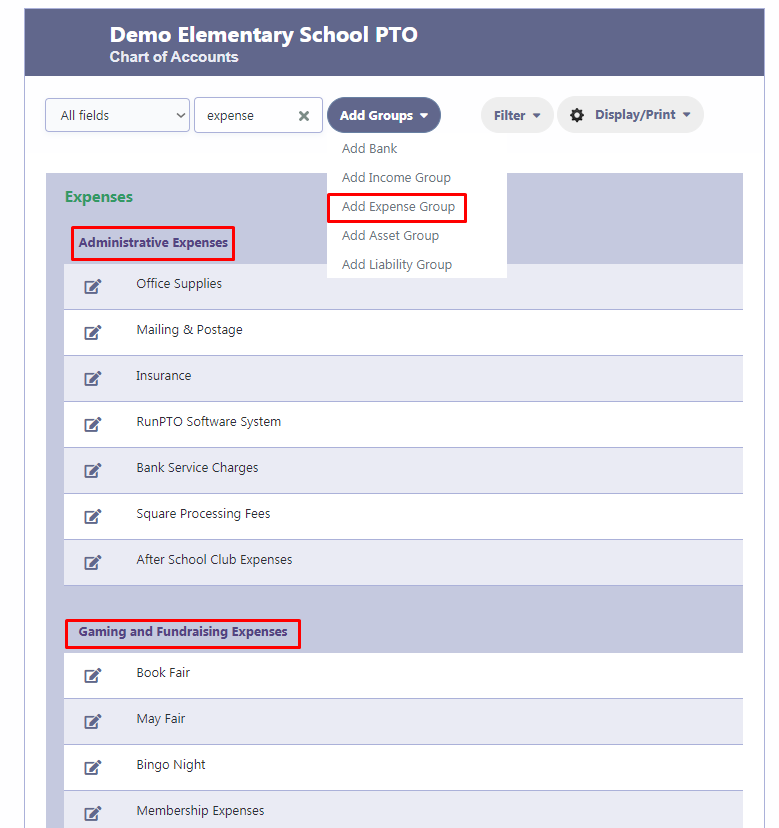
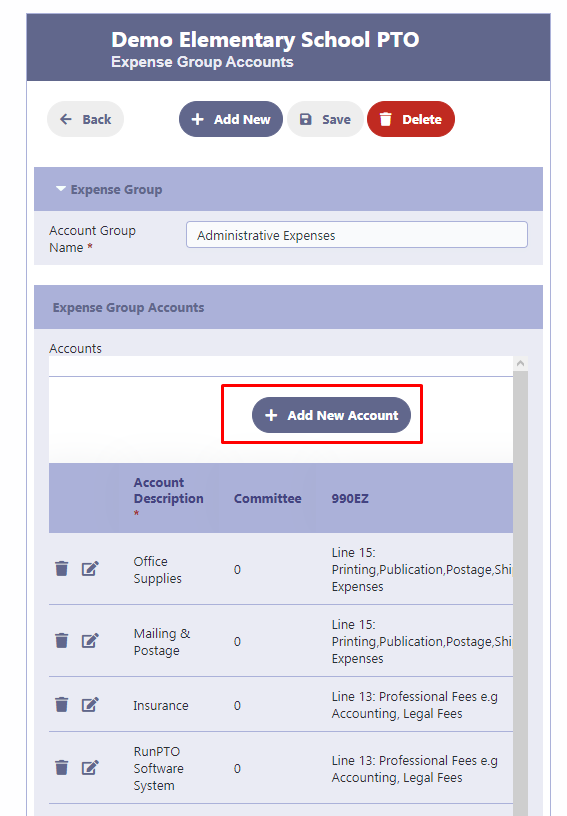
Adding Expense Groups
To effectively categorize your expenses, begin by adding expense groups such as Administrative Expenses, Gaming & Fundraising Expenses etc. Click on “Add Expense Groups” to create these groups. Once added, you can click on the pencil icon to add individual accounts under each expense group.
Adding Expense Accounts
To organize your expenses within each expense group, you can start by entering individual accounts. Simply click on “Add New Account” under the respective expense group. Once you have entered the account details, you can use the Check icon to save the account. If you need to make any edits, click on the Pencil icon, and if you want to delete an account, click on the Trash Can icon.
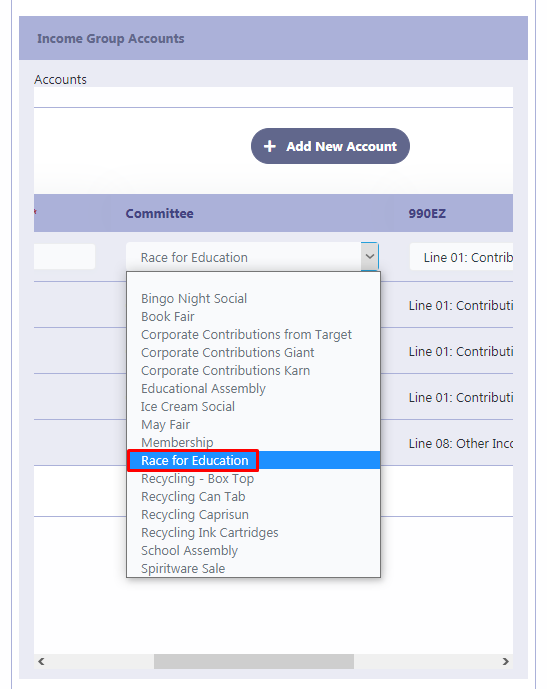
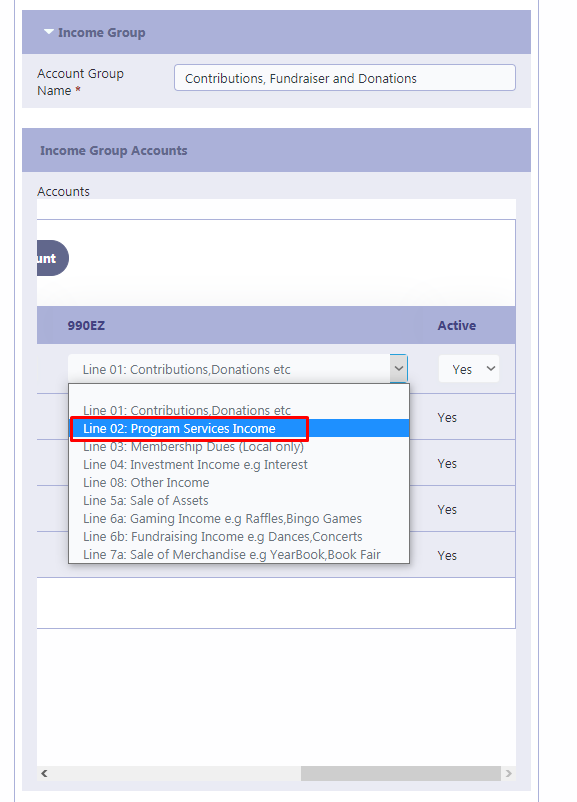
Associate Accounts with Committees/990EZ Codes
To enhance your financial reporting, you have the option to associate a Committee with an Account Category from the dropdown list of your PTA/PTO committees to a Income Account or Expense Account. This feature allows for committee-wise reporting, as a single committee can have multiple income or expense account categories associated with it.
Additionally, you can associate a 990EZ code with an account category for 990EZ reporting purposes.
It’s important to note that all transactions are entered at the Account level and not at the Account Group level.
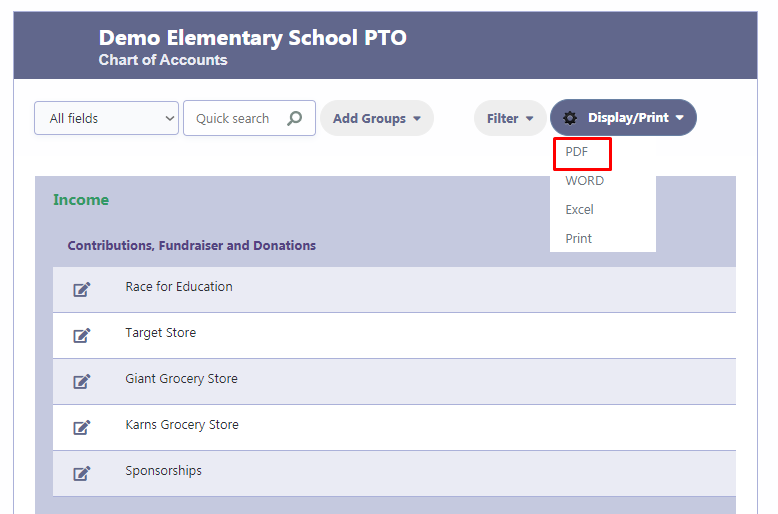
Display/Print Chart of Accounts
To view or print your Chart of Accounts, simply click on the “Display/Print” option. This will provide you with a range of choices for displaying or exporting your Chart of Accounts. You can select options such as PDF, Word, Excel, or a screen format suitable for printing.
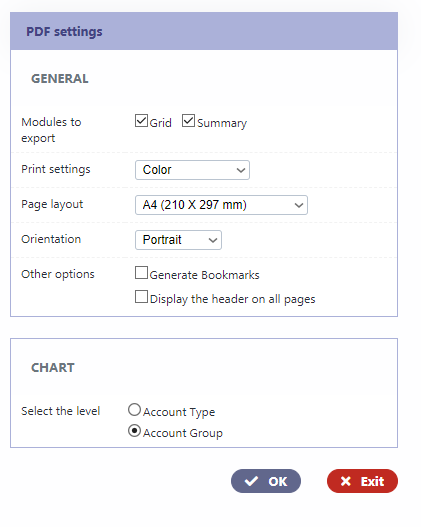
PDF Options
When you select the PDF option, you will have several choices for generating and customizing your PDF document. These options may include selecting the color, page layout, page orientation, paper size and other formatting preferences. You can tailor the PDF output to meet your specific needs and preferences.
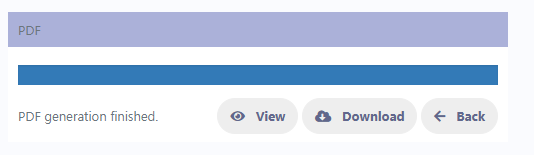
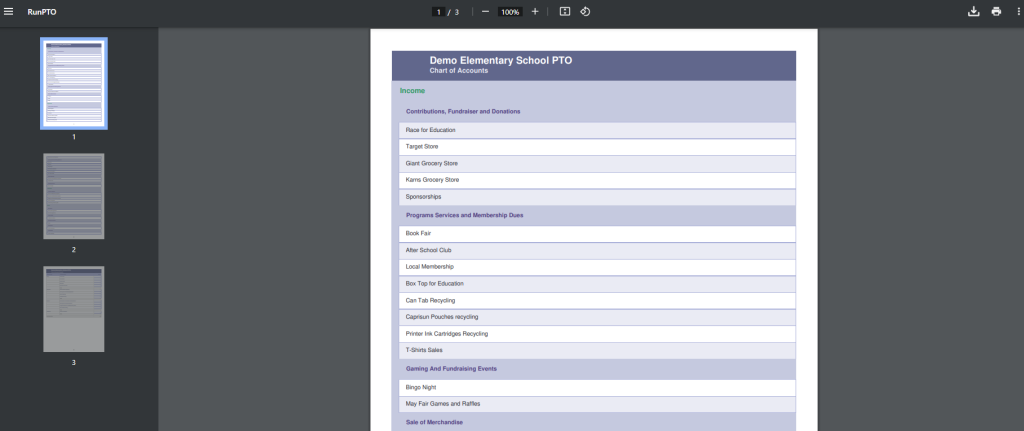
Upon clicking the View option, the PDF file of your Chart of Accounts will be displayed as shown below. From here, you have the option to print the document or download it for further use.
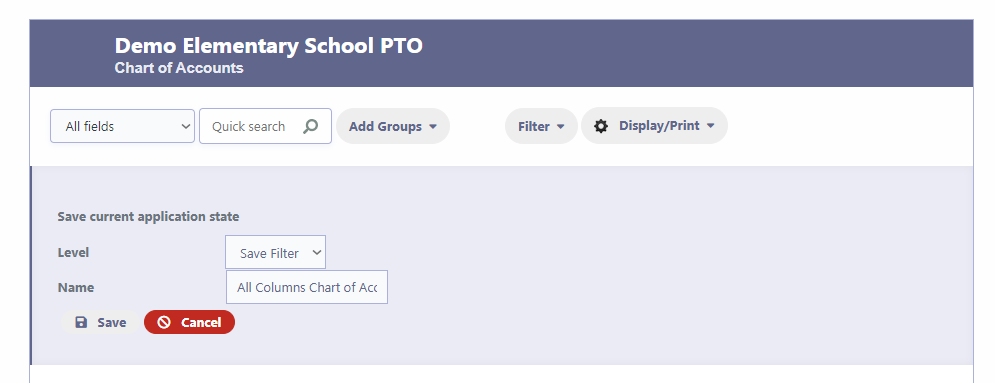
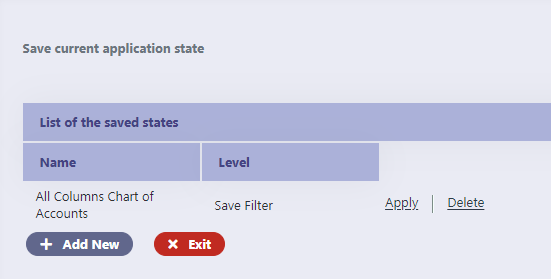
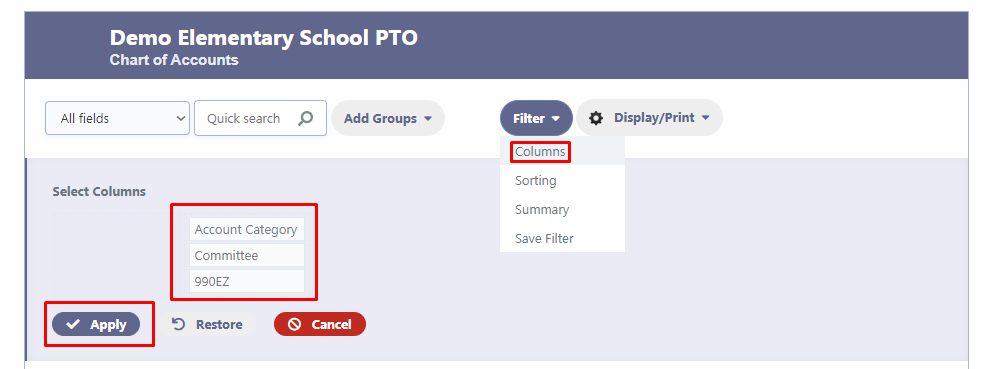
Filtering your Chart of Accounts Report
To refine your Chart of Accounts report, you can utilize the filtering options available. Click on the “Columns” button to select specific columns you wish to display or use the search function to find specific entries.
You can also save your customized report by clicking on “Filter/Save” and providing a name for it. If you want to revisit the filtered report state at a later time, simply click on “Filter/Save”. When you’re ready to apply the chosen criteria to generate the report, click on “Apply”.