Check Printing
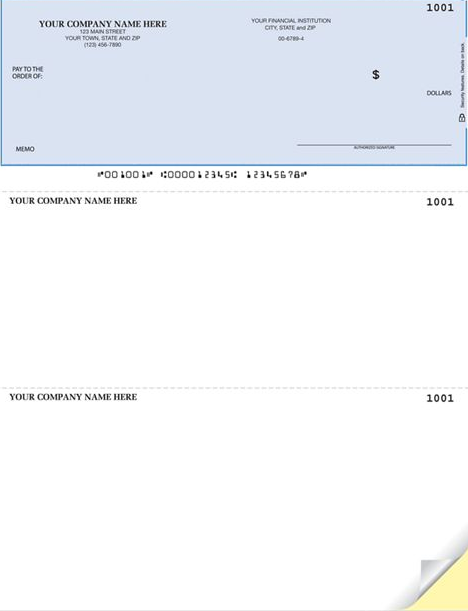
Printing Checks on Preprinted Stock
In RunPTO, you have the convenience of printing checks on preprinted stock. The recommended format for the preprinted check stock is one check per page in the check-on-top format. The preprinted stock usually includes important details such as:
- Organization’s Name, Address, and Logo
- Bank Name and Address
- Check Number
- MICR line, which includes the Bank Routing Number and Account Number already printed
By using preprinted check stock, you can ensure that your checks are professional-looking and include all the necessary information for banking purposes.

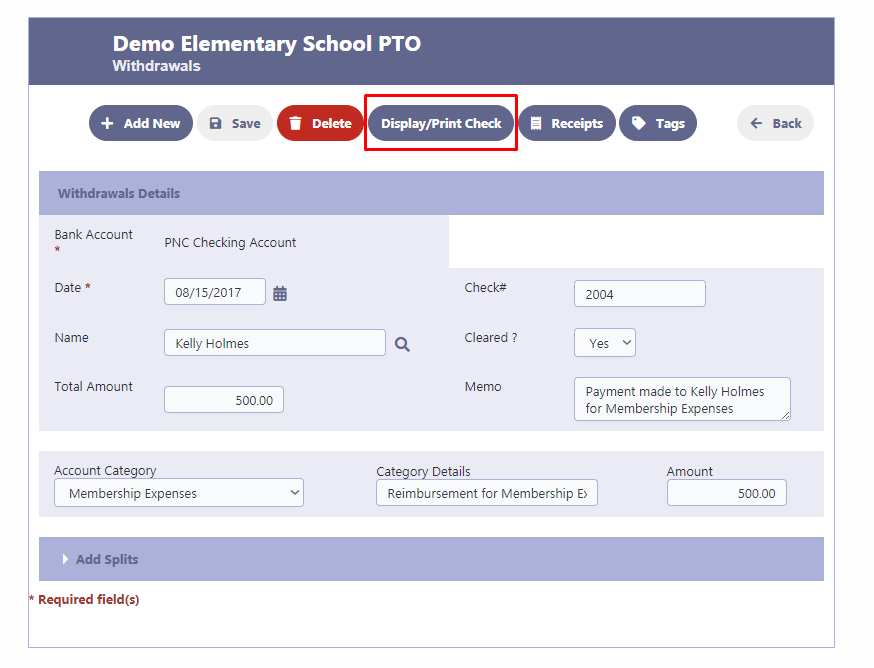
Display/Print Checks
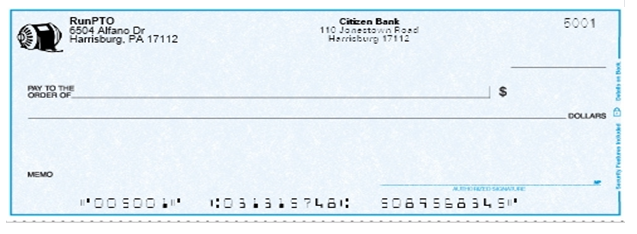
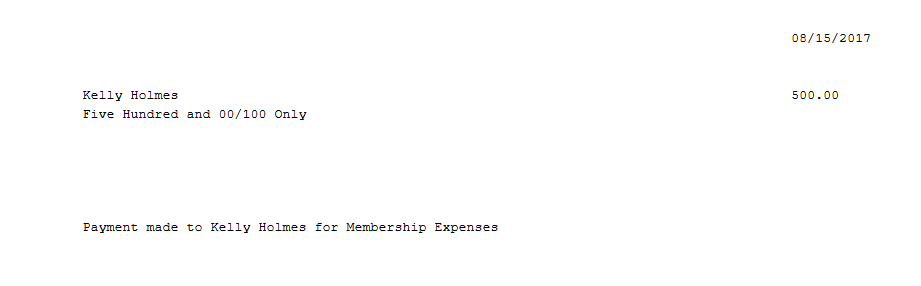
When using RunPTO’s check printing feature, the following check details will be printed on your preprinted check:
- Check Date: The date of the check.
- Pay To Name: The recipient’s name or the entity being paid.
- Amount: The monetary value of the check.
- Amount in Words: The written form of the check amount.
- Memo: Additional notes or description for the payment.
These check details will be automatically retrieved from the Expense transaction for which the check is being printed. To access and print the check, simply retrieve he Expense transaction in the Withdrawals section. Then, click on “Display/Print Check” to generate the check with the associated details.
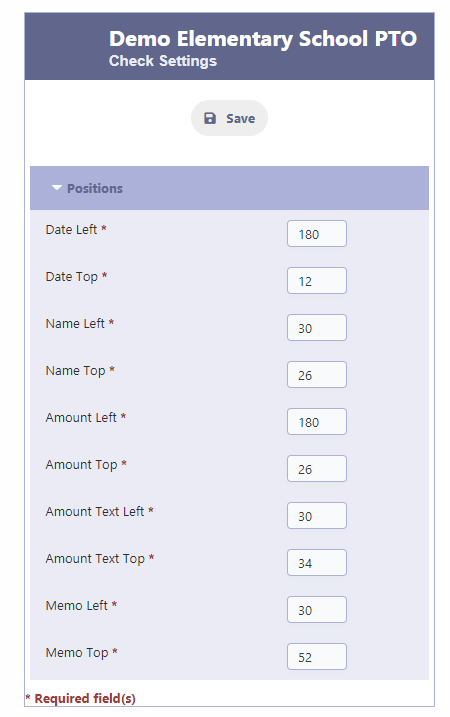
Adjusting Check Position for Preprinted Stock
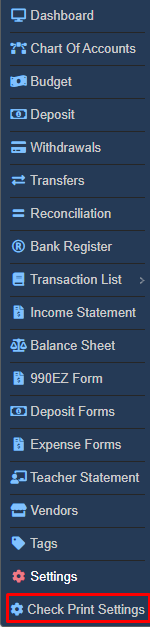
To ensure proper alignment of your checks on preprinted stock, you can easily adjust the check position within RunPTO. Follow these steps to access the Check Print Settings:
- Navigate to the Check Print Settings section.
- In the settings, you will find options to adjust the check position.
- Use the provided tools or input fields to fine-tune the alignment of the check on the preprinted stock.
- Preview the changes to verify the positioning of the check.
- Once you are satisfied with the adjustments, save the settings.
By customizing the check position in the Check Print Settings, you can achieve accurate alignment when printing checks on your preprinted stock.
In RunPTO, the default settings are designed to work well with most preprinted check stocks. However, if you encounter any alignment issues while printing, you have the flexibility to adjust the positions. The position adjustments are measured in millimeters and can be made for different elements of the check. Here are the key positions you can modify:
- Date Left/Date Top: This determines the position of the Check Date on the check.
- Name Left/Name Top: This controls the position of the Check Payee’s name.
- Amount Left/Amount Top: This specifies the position of the Check Amount.
- Amount Text Left/Amount Text Top: This determines the position of the Check Amount displayed in words.
- Memo Left/Memo Top: This controls the position of the text on the Memo Line.
By modifying these position settings, you can ensure that the printed information aligns correctly with the designated areas on your preprinted check stock.