Membership Setup
Membership Form Setup
To set up your membership form, follow these steps:
- Navigate to the Administrator/Setup section.
- Expand the Membership Setup menu.

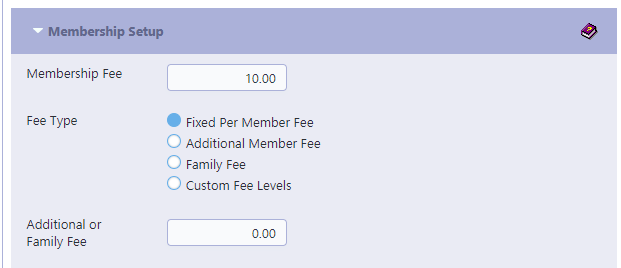
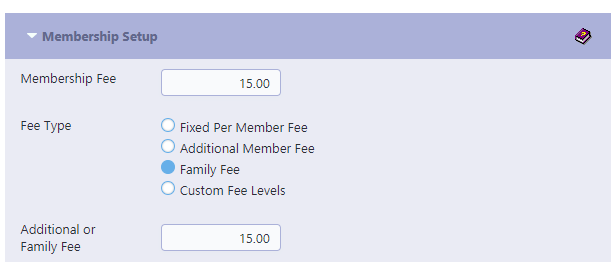
Membership Fee, Fee Type, Additional or Family Fee
Prior to making this available you need to set up the fee structure based on your Fee Type selection .
Fee Type: This will determine the fee per member is charged.
- Fixed Per Member Fee: With this fee structure, each member incurs an identical fee. For instance, if the Membership Fee is designated as $10 and you’re enrolling three members, the cumulative charge will amount to $30 ($10 multiplied by 3 members).
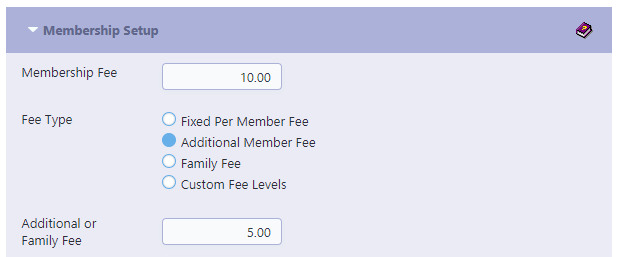
- Additional Member Fee: This fee structure allows you to set a distinct fee for each supplementary member. For instance, if the Membership Fee is established at $10 and the Additional Fee column is configured at $5, the cumulative charge for a signup of three members would amount to $20. This breaks down as $10 for the primary member and an additional $5 for each of the subsequent two members.
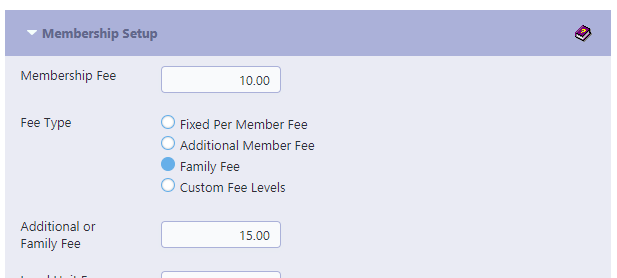
- Family Fee: The fee structure varies based on the number of members signing up. If there’s a single member, the fee specified in the Membership Fee column is applied. For multiple members, the fee from the Additional or Family Fee column is utilized. For instance, if the Membership Fee is $10 and the Additional or Family Fee is $15, the total charge for three members signing up will be $15. However, if only one member signs up, the charge will be $10. If you wish to apply a fixed fee of $15 regardless of the number of members, simply set both the Membership Fee to $15 and Family Fee to $15. This ensures clarity in the fee calculation process.
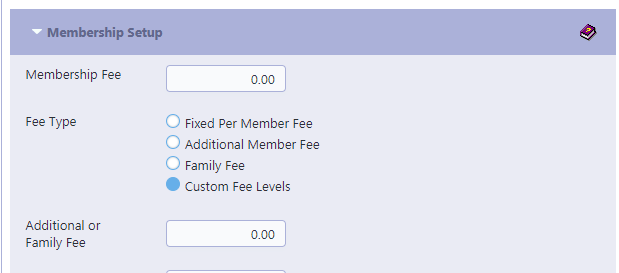
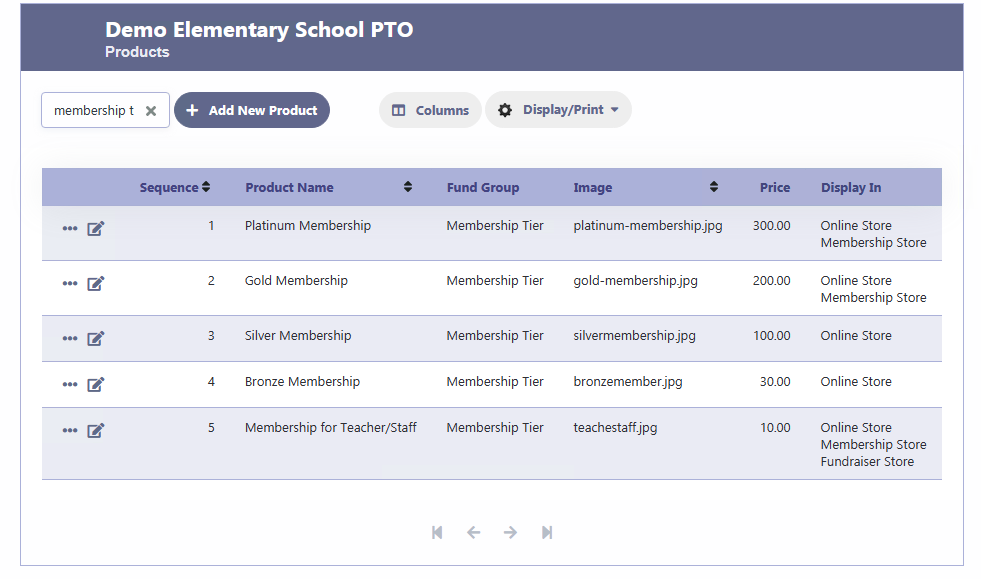
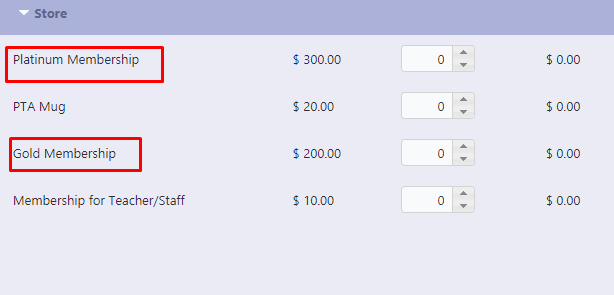
- Custom Fee Levels: For the Custom Fee Levels option, set the Membership Fee to 0. Setting this option means you have the flexibility to define other membership options as products in the Online store. By enabling the Show Store option, these membership options will be available for selection.
If you do not want the Store and just collecting donations, then enable Show Donation column
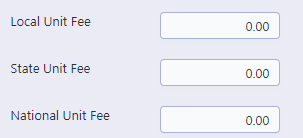
PTA Specific columns: If you are a PTA you can add parts of the fee that go to Local, State & National units. This is just for reporting allocations.
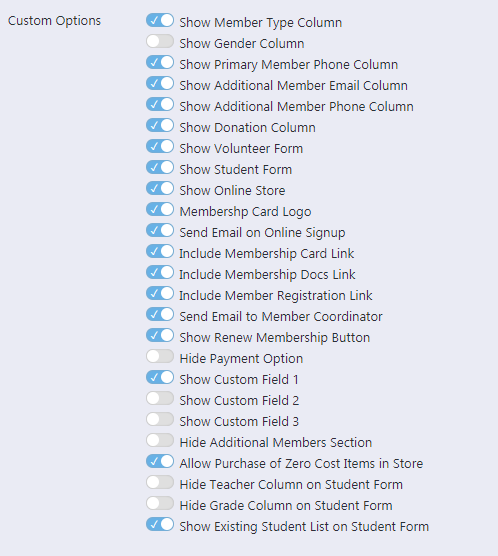
Custom Options:
You may decide here if want to display certain columns or permit actions on the Membership Signup Form.
The options need to be checked/unchecked as required.
Show Member Type Column: This will determine the display of the Type column
Show Gender Column: This will determine the display of the Gender column
Show Phone Column: This will determine the display of the Primary Member Phone column
Show Additional Email Column: This will determine the display of the Email column for additional members
Show Additional Phone Column: This will determine the display of the Phone column for additional members
Show Donation Column: This will determine the display of the Donation Column on the online Membership form. On the Manual Entry form, Donation column will not be displayed. Any amount above the Membership fee automatically goes to the donation amount.
Membership Card Logo: This if checked will bring up the Membership Card with custom logo image on it. The custom logo image should be submitted to RunPTO for upload, otherwise it will display a default image.
Show Volunteer Form: This will determine the display of the Volunteer Signup form.
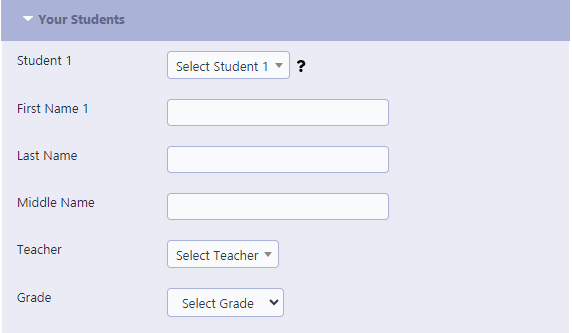
Show Student Form: This will determine the display of the Student related columns such as First Name, Last Name, Grade, Teacher. The Teacher and the Grade information will be appear as a dropdown list. The Teacher list needs to be setup for selection of Teachers on the Membership Form. The Beginning and the Ending Grade needs to be setup here for the Grade list
Send Email On Online Signup: A member will receive email on signing up if this option is checked.
Include Membership Card link: This will include the Membership Card link in the email sent if checked.
Include Membership Docs link: This will include the Membership Docs link in the email sent if checked.
Include Membership Registration link: This will include a link for Member Registration where the Member can create a RunPTO User Id and Password to login to RunPTO.
Send Email to Member Coordinator: A notification email will be sent to the email in the Member Coordinator Email box each time a member signs up.
Show Renew Membership Button: This is helpful if you had membership in the previous year and you do not want your members to reenter the information and want to update the Students info. The Renew Membership button will be shown on Membership Signup Form at the top. When this button is clicked, the member will be required to enter their email if they were members in the prior year. If they were members, an email will be sent to them. Upon clicking on the link in the email, they will be shown all the information they had entered in the prior year. They can also update the Student Info.
Hide Payment Option: This will hide the Payment Option dropdown list from the Membership Form only if the setting is a single option like Online Payment or Signup Only.
Show Custom Field 1:
Show Custom Field 2
Show Custom Filed 3:
You have the option to define three custom fields on the Membership Signup Form. You can activate these columns and provide corresponding descriptions for each field below.
Hide Additional Members Section:
When activated, this feature will hide the Additional Members Section, allowing users to sign up for only a single member.
Allow Purchase of Zero Cost Items in Store:
Enable this option to allow purchases of items with zero cost within your store. By activating this feature, users will be able to select and acquire items that are priced at zero dollars, providing greater flexibility for transactions and facilitating the distribution of free resources or promotional items. This option can be particularly useful for managing giveaways, promotional events, or special offers where certain products are made available without any associated cos
Hide Teacher Column
Enable this option if you want to hide the Teacher column
Hide Grade Column
Enable this option if you want to hide the Grade column
Show Existing Student List on Student Form
Enable this option if you have an existing student directory that members can choose from.
Member Coordinator Email: This will be point of contact email mentioned on the email the member receives on signing up. This can be kept blank if the coordinator does not want their email to be mentioned in the email sent to the Member.

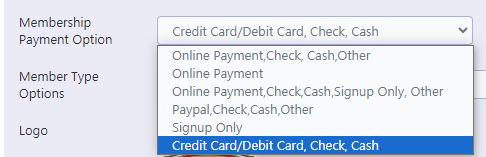
Membership Payment Option
Based on the selections, these payment options will appear on the Membership Form:
Online Payment option refers to Stripe or Paypal payments
Cash refers to payment by cash
Check refers to payment by check
Signup Only refers to no fee signup
Paypal refers to payment by Paypal
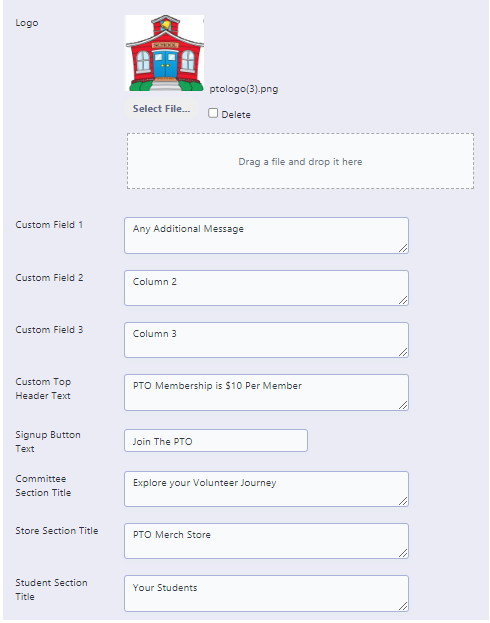
Logo
Upload your custom logo here for it appear on the Membership Card.
Please note that for this logo to appear on the Membership Card, the Membership Card logo option has to be checked in the Administration/Setup/Membership Setup

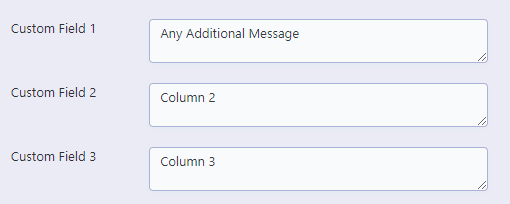
Custom Field 1
This is the custom field 1 prompt. You have the capacity to ask a maximum of 3 prompts or gather 3 pieces of information on the Membership Signup Form
Custom Field 2
This is the custom field 2 prompt. You can include up to 3 prompts or collect 3 pieces of information on the Membership Signup Form.
Custom Field 3
This is the custom field 2 prompt. You can include up to 3 prompts or collect 3 pieces of information on the Membership Signup Form.

Custom Top Header Text
Please provide the custom text for the second line of the top header for your membership signup form.
The default text is
Membership Fee: <$> per member or
Membership Fee: <$> per member Additional Fee <$> or
Membership Fee: <$> per member Family Fee <$>
Make sure you include the fee amount in any text you change


Signup Button Text
The signup form button text can be something like
Become a Member
Enroll Today
Support Us
Get Involved
Join Our Community
Membership Signup
Support Our Cause
Join the PTO
Be a Member
Participate Now
Choose a text that clearly conveys the action of signing up for membership for your organization and encourages users to join.


Committee Section Title
Please provide the text for the committee list section title for your Membership signup form.
The default text is Committees to Volunteer
Examples of this can be
Explore Your Engagement Options
Shape Your Volunteer Experience
Customize Your Participation
Design Your Contribution
Tailor Your Involvement
Craft Your Volunteer Journey
Personalize Your Engagement
Select Your Participation Areas
Design Your Volunteer Path
Craft Your Involvement Plan


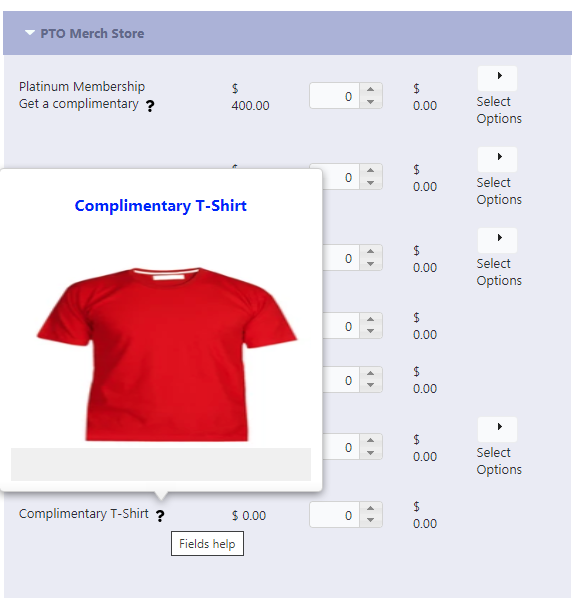
Store Section Title
Update the Store Section title by entering a new title if desired.
Examples of other text can be:
Shop
Online Store
PTO Shop
Merchandise
PTO Merch Store
Shop Items
Purchase Items
Product Catalog
School Store
Get Your Gear

Student Section Title
Update the Students Section title by entering a new title if desired.
Examples of the text can be:
Student Information
Student Details
Attendee Details
Enrollee Information

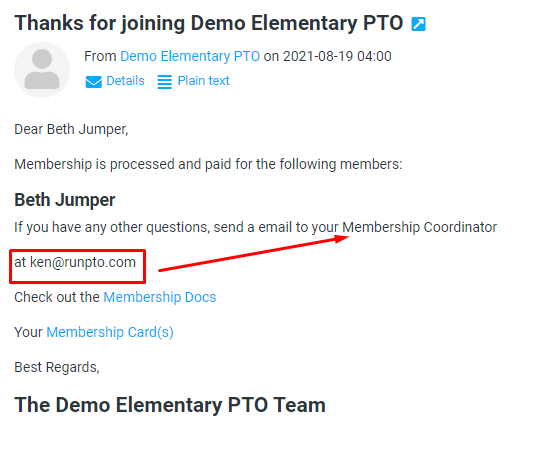
Confirmation Email sent to the Member
After a member successfully signs up, they will receive a confirmation email from the organization. This email serves as a formal confirmation of their membership and provides important information and resources.
The email includes:
- Confirmation of Membership: The email confirms the member’s successful enrollment.
- Member Coordinator Contact: The email provides the contact information of the Member Coordinator, who can assist with any questions, concerns, or additional information the member may need.
- Membership Documents: The email includes direct link to access essential membership documents.
- Membership Cards: The email also provides links to access the member’s personalized digital membership card.
By sending this comprehensive confirmation email, members can have all the necessary information at their fingertips, ensuring a smooth and enjoyable membership experience.
Example of Membership Doc link
The email sent to the member includes an URL link to the Membership Documents which will be shared with the member if it is uploaded to Documents/Membership Docs. By clicking on the link, members can conveniently view and download the documents directly from their email. This feature ensures that members have easy access to any necessary forms, guidelines, or informational materials related to their membership.

Example of Membership Card link
The Membership Card link provided in the email showcases an example of the personalized membership card. This card is designed to include custom details such as the organization’s logo, the member’s name, the current school year, and a unique QR code. The QR code embedded on the card serves multiple purposes, including serving as an entry ticket for events or granting access to exclusive privileges. Members can click on the Membership Card link to view a digital representation of their membership card, ensuring they have easy access to their membership information and benefits.

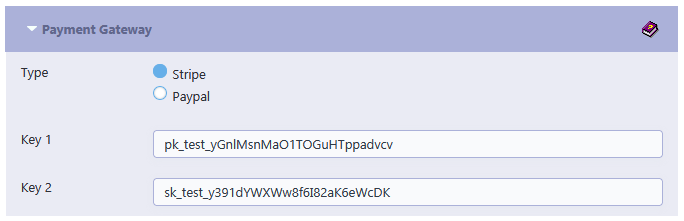
Setting up your Payment Gateway
To set up your payment gateway for collecting membership fees, you have two options available: Stripe or Paypal
Choose the payment gateway that best suits your organization’s needs and preferences.
To accept membership payments online, you must open a separate Stripe or Paypal Business account.
Please note that RunPTO does not handle payment collection; the funds will go directly to your Stripe or Paypal account.
It is your responsibility to set up a business account with either Stripe or Paypal.
RunPTO recommends Stripe as the preferred option.
Stripe Accounts can be created with the Stripe Connect Button on the Setup Form.
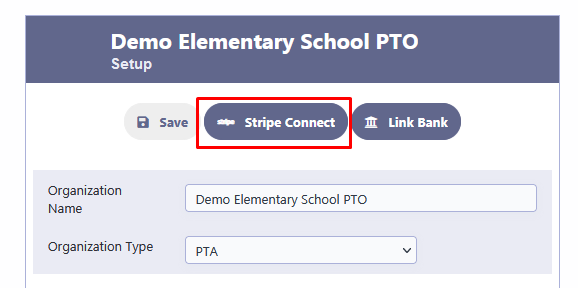
Click here to read more on creating a Stripe Connect account from RunPTO
Alternatively below are the steps to go about setting up your account at Stripe.
- Go to www.stripe.com and open your Stripe account
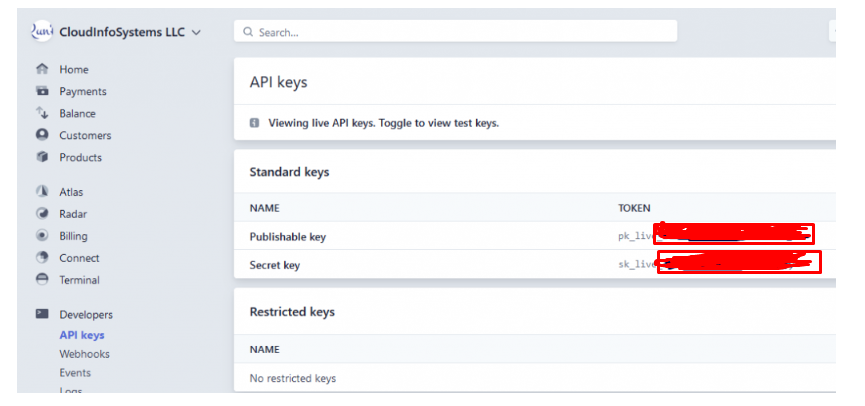
- After your Stripe account is opened, go to the Dashboard, then click on Developers and then API keys.
- Copy the Publishable Key in Key 1 column and Secret Key in Key 2 column of your school setup. Save and exit RunPTO.
- You are all set to collect Membership Fees from your Members. You can also use test keys to test by creating dummy signups to see how it all comes in before you go live.
- You can click on Payments on the Stripe Dashboard to view your payments.
Important: Make sure your Keys are Live Keys before you start collecting funds from your Membership form, Online Store or Fundraiser Form. Stripe Live Keys will be prefixed with pk_live.. and sk_live…
Below are the steps to go about setting up your account at Paypal
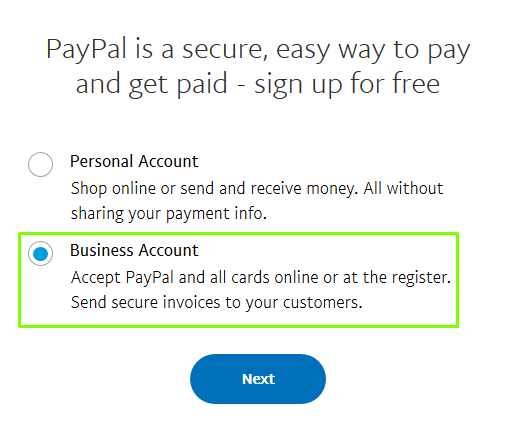
Go to www.paypal.com and signup for a business account.
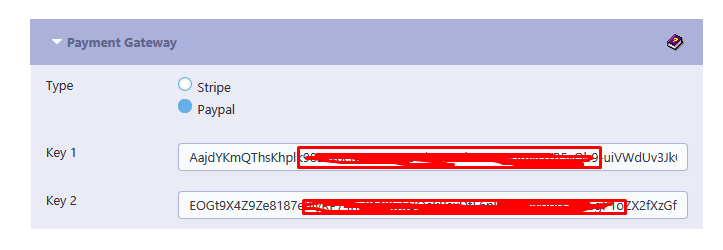
If you selected Paypal , you will need the Client Id value in Key 1 and Secret in Key 2
1. Go to: https://developer.paypal.com/developer/applications/ and log in with your PayPal business account credentials.
2. Navigate to the My Apps & Credentials tab and click the Create App button in the REST API Apps section. This allows the RunPTO system to authenticate with PayPal ..
3. Name the application (this does not impact the integration) and associate the live account.
4. You can create a Sandbox account for testing or you can directly create the Live account.

4. Click the Create App button.
Important Note:
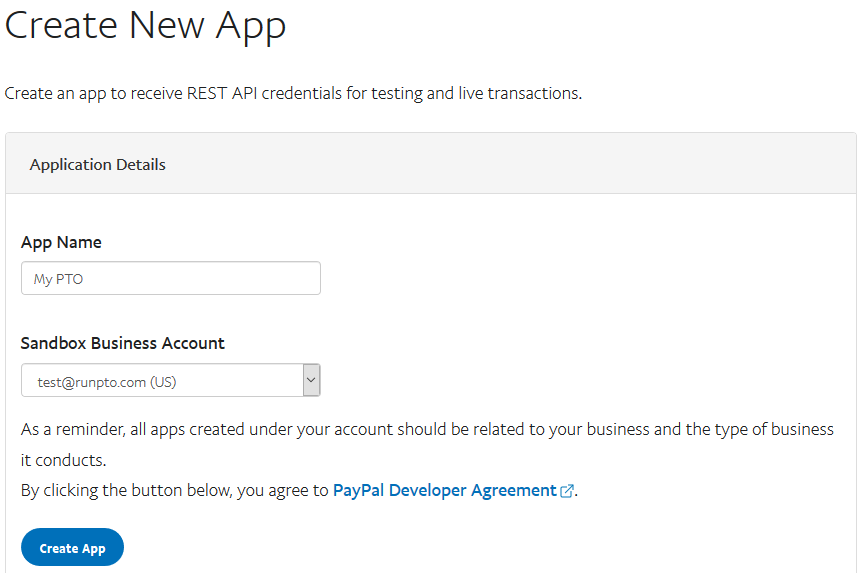
1. The below example is for Paypal SandBox Keys/Test Keys for testing if required. No monies are withdrawn from the customer accounts if SandBox/Test keys are used.
2. Make sure you create a live app and switch to Live Keys before you start collecting funds.
SandBox App Screen
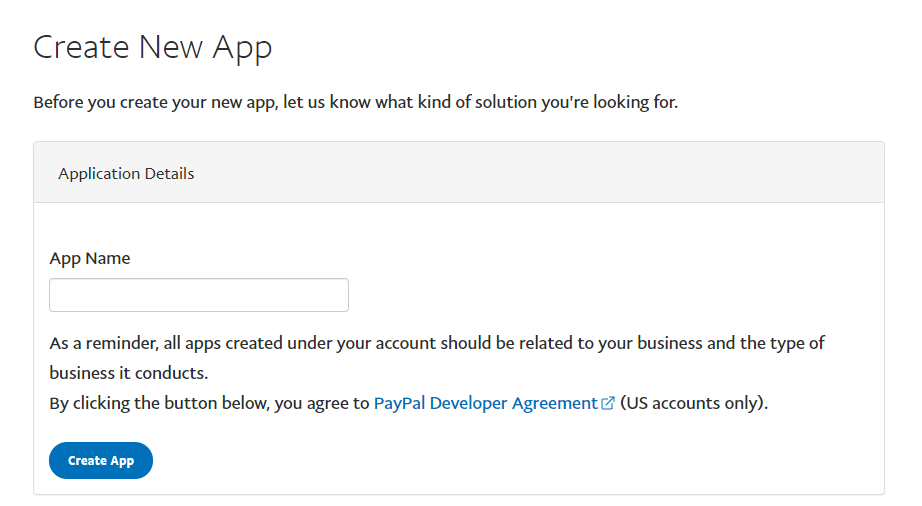
Live App Screen
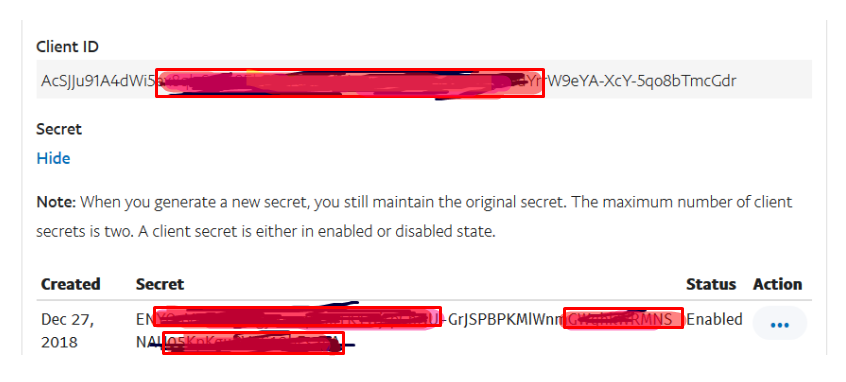
5. The App will be created and the administrator can copy the Client ID for the test or live environment into the Key 1 column and secret in the Key 2 column.
Note: These values do not expire, but they can be disabled by an administrator if needed.
6. Paypal Test Client Id begins with AC… and Secret Key begins with EN.. Paypal Live keys will have other prefixes.
After entering live keys, you will be all set to collect payments from your members in your Paypal account and using Paypal Smart Buttons.