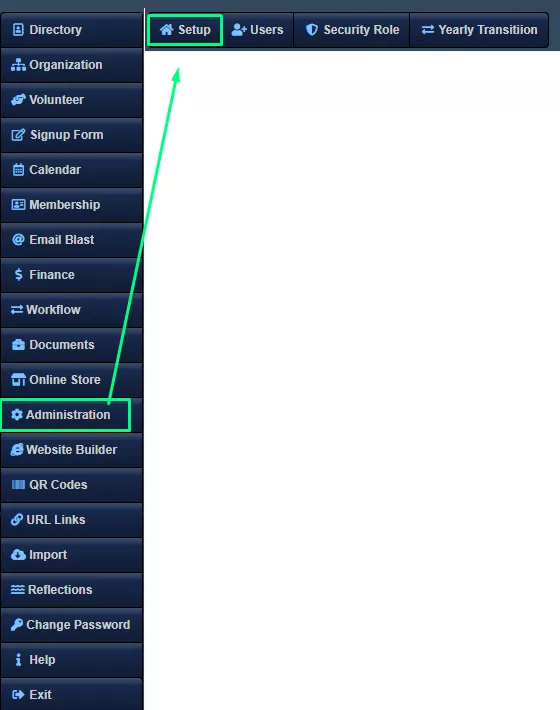
Initial Setup
Navigate to Administration/Setup section.
Organization Information
- The Organization Name and Type that shows up were entered during the sign-up process and can be altered if needed.
- Available Organization Types include PTO, Booster Club, PTA, PTSO, etc.
- To make any other necessary changes, please expand the relevant tabs.
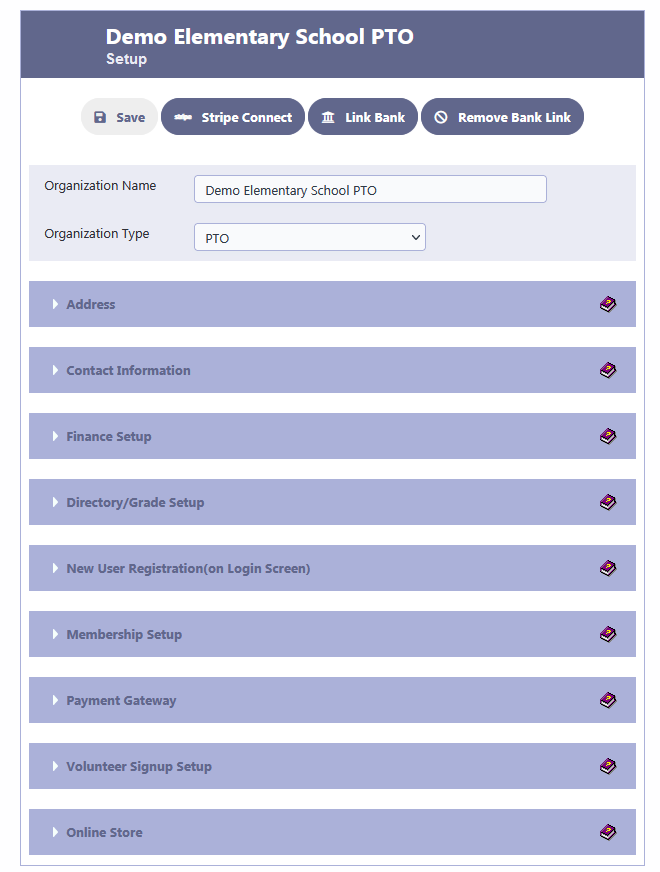
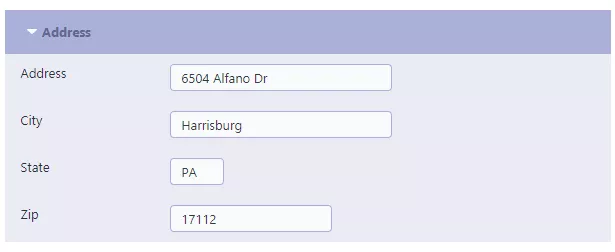
Address
- Enter the organization’s address, city, state, and zip code.
Contact Information
- Enter the contact’s name, phone number, and email address.

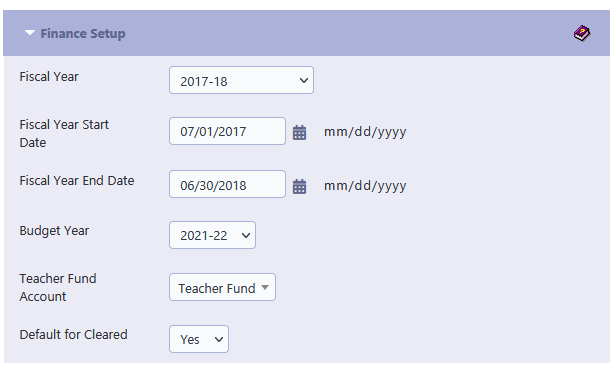
Finance Setup
When you sign up, the fiscal year, start date, and end date are set for the year of sign-up.
- Fiscal Year
This is the current school year. - Fiscal Year Start Date
The fiscal year typically starts on July 1st, which marks the beginning date. - Fiscal Year End Date
June 30 is typically the ending date of the fiscal year. - Budget Year
To create a budget for the upcoming year, simply choose the corresponding year from the options. The default budget year is set to the current year. - Teacher Fund
If you allocate funds for Teachers, select the appropriate account you have set up in the chart of account which represents this fund. - Default for Cleared
The Cleared field in transaction records for Deposits, Withdrawals, and Transfers can have a default value, which can be set to either Yes or No.
The fiscal year (fiscal start date – fiscal end date) for your school typically runs from July 1st to June 30th and should not be altered once set, except during year-end transitions.
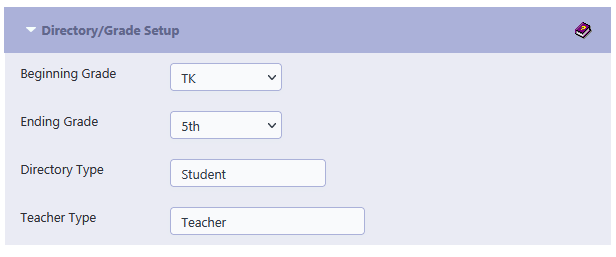
Directory/Grade Setup
- Beginning Grade
Beginning Grade is needed if you are going to maintain a Student/Athlete Directory - Ending Grade
Ending Grade is needed if you are going to maintain a Student/Athlete Directory - Directory Type
You may choose to retain the column header Student in the directory, or you can opt to change it to a more suitable header such as Athlete or any other heading that aligns better with the purpose of your organization. - Teacher Type
You may choose to retain the column header Teacher in the directory, or you can opt to change it to a more suitable header such as Coach or any other heading that aligns better with the purpose of your organization.
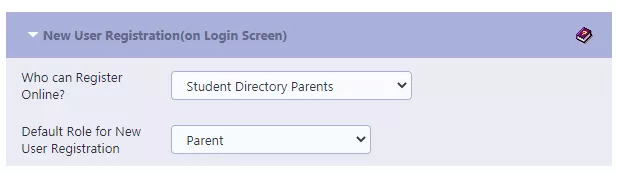
New User Registration
Who is eligible to register online?
The configurations in this segment govern the criteria for user eligibility when utilizing the “New User Registration” function on the login screen. It’s important to recognize that administrators retain the capability to generate users outside of these constraints; these settings exclusively pertain to online new user registration.
Four options are available:
- Disable new user registration
- Allow registration for all members who have signed up
- Limit registration to parents only
- Limit registration to all parents listed in the student directory.
Default Role for New User Registration
- This pertains to the pre-assigned security role for users who register online.
- The default role serves as the initial security role granted to newly registered users via online registration. This role should encompass restricted privileges for security purposes. To gain insight into crafting security roles, refer to the “Create Security Roles” segment within the Administration section.
- It is advisable to fashion a role dedicated to the parent portal, imbued with limitations tailored to certain modules including the student directory, volunteer sign-up, member sign-up, and calendar.
- Avoid assigning administrator-level privileges as the default role.
Some of the information in the following tabs can be configured at a later time as required.
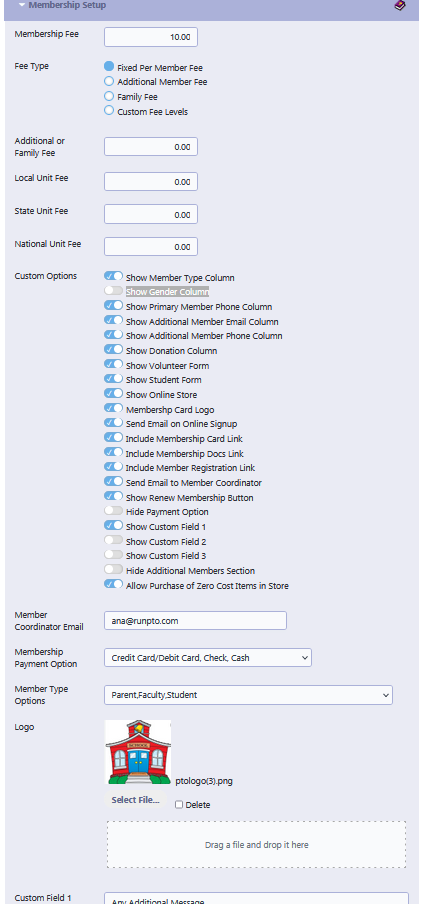
Membership Setup
Membership Setup is explained in greater detail in the Membership section. You can set fees based on the fee type for collecting membership fees and also control the visibility of certain columns on the membership form.
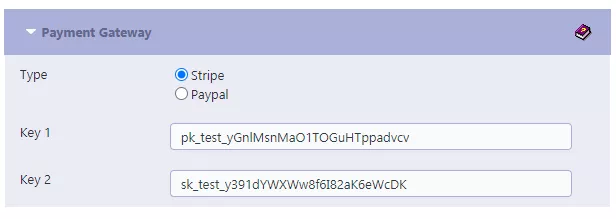
Payment Gateway
The Payment gateway is where you can configure the Stripe or PayPal payment system with their respective keys, allowing for direct online payments for membership or shopping cart transactions. Further instructions on setting this up can be found in the Membership Setup section.
Volunteer Signup Form
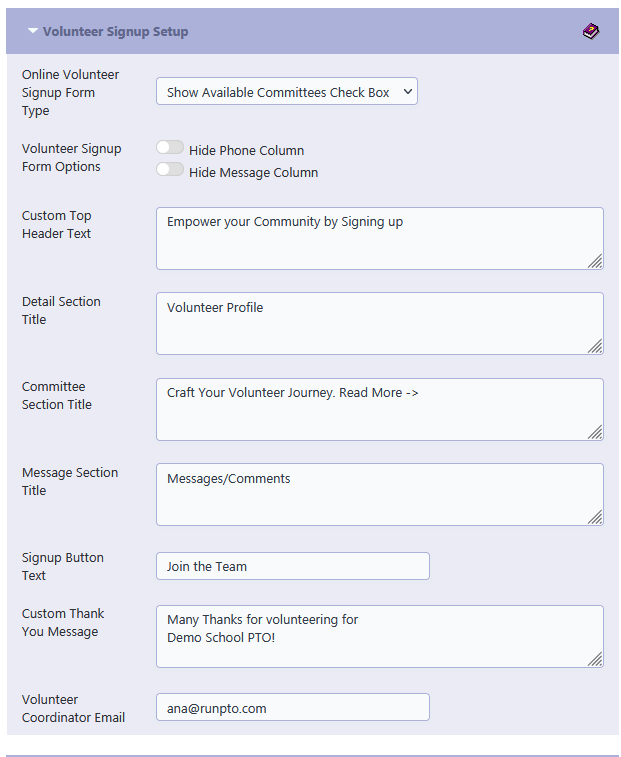
Online Volunteer Signup Form Type
There are two formats for presenting the volunteer sign-up form on the screen. If you select Show Available Committees, you will need to go to the Committees section and specify the number of volunteers needed.
Custom Top Header Text
Please provide the custom text for the second line of the top header for your volunteer signup form.
The default text is Volunteer Signup. The text can be
- Signup to enlist as a Volunteer
- Join our Mission
- Support our PTO cause
- Get Involved
- Empower our Community
- Contribute your Skills
- Become a Volunteer
- Be a Changemaker
Detail Section Title
Please provide the text for the volunteer details section title for your volunteer signup form.
The default text is Volunteer Details
Examples of this can be
- Participant Information
- Personal Details
- Volunteer Profile
- Engager Information
- Contributor Particulars
- Helper Insights
- Supporter Specifics
- Collaborator Data
- Enthusiast Info
- Team Member Particulars
Committee Section Title
Please provide the text for the committee list section title for your volunteer signup form.
The default text is Select Committees/Programs to Volunteer
Examples of this can be
- Explore Your Engagement Options
- Shape Your Volunteer Experience
- Customize Your Participation
- Design Your Contribution
- Tailor Your Involvement
- Craft Your Volunteer Journey
- Personalize Your Engagement
- Select Your Participation Areas
- Design Your Volunteer Path
- Craft Your Involvement Plan
Message Section Title
Enter a custom title for the Message/Comments section
Signup Button Text
The signup form button text can be something like
- Sign Up Now,
- Volunteer Here,
- Join the Team,
- Get Involved,
- Register as a Volunteer, or
- I Want to Help.
Choose a text that clearly conveys the action of signing up to volunteer for your organization and encourages users to participate.
Custom Thank You Message
You can input a custom thank you message of up to 300 characters. This message will appear after the volunteer signup up.
Volunteer Coordinator’s email
Email for the Volunteer Coordinator to receive notifications for each volunteer sign-up.
Online Store
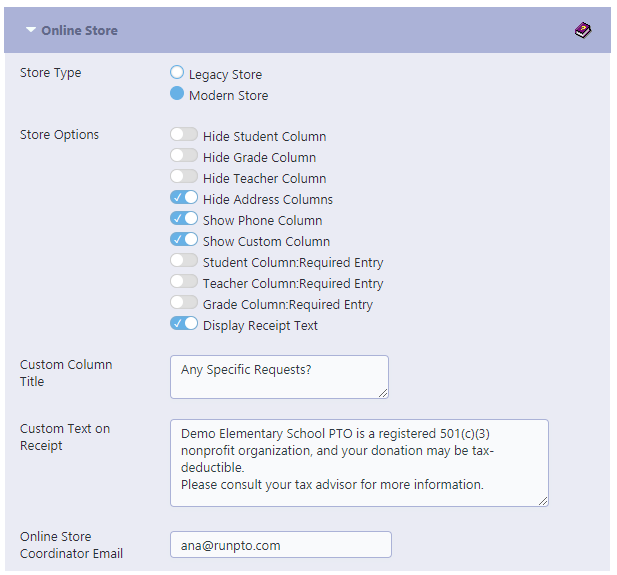
Store Type
The Legacy store template is an older version, whereas the Modern template is a more recent one. In the Legacy template, customer information is collected at the beginning of the shopping process, while in the Modern template, it is collected at the end.
Store Options
- The Student column on the Customers Information Page can be hidden using the Hide Student option.
- Similarly, the grade column can be hidden by selecting the Hide Grade option,
- and the teacher column can be hidden using the Hide Teacher option.
- If one wishes to hide the address column on the Customers Information Page, they can use the Hide Address Columns option.
- Moreover, the option to display optional Phone or a Custom Column is at your disposal.
- Add a title to the custom column if used.
- Should the need arise, you can also make the Student, Teacher, or Grade fields mandatory as required.
- Feel free to tailor the Customer Information page display according to your preferences and necessities.
- Additionally, you have the option to incorporate the provided Receipt text into the Customer Receipt.
Online Store Coordinator Email
Each time a sale is made on the Online Store, a notification email is sent to the email entered here.
This can be kept blank if no notification email is required.
Custom Text on Receipt
Please provide the customized receipt text in the space provided below. An example of such text could be as follows:
“Demo Elementary School PTO is a registered 501(c)(3) nonprofit organization, and your donation may be tax-deductible. Please consult your tax advisor. for more information.“
Online Store Coordinator Email
Each time a sale is made on the Online Store, a notification email is sent to the email entered here.
This can be kept blank if no notification email is required.
Next Steps to proceed in the Knowledge Base:
- Begin with setting up your Organization Structure
- Establish your Board/Chairperson List and Committee List in the Organization module
- Assign tasks to specific individuals through the creation of Security Roles.
- Create Users and assign them the respective Security Roles
- Set up Calendar Events for the school year
- Build your website using the Website Builder
- Encourage volunteers to sign up for committees using the Volunteer Signups Form and share it through email/text, website embed, or QR Codes.
- Set up Signup Forms for PTA/PTO events and share them via email/text, website embed, or QR code.
- The Treasurer can start organizing finances using the Finance Manager. and setting up the Chart of Accounts.
- The Student Directory Administrator can initiate the process by sending a URL link for Student Directory Registration. through email/text or website embed.
- The Membership Administrator can begin with Membership Setup.
- The Document Administrator can start uploading Newsletters, Meeting Minutes and other relevant documents.